How do I integrate WildFly with Eclipse? This tutorial shows how to do it, by installing the JBoss Tools plugin on Eclipse so that you can manage e local or remote WildFly application server without leaving your favourite IDE.
Installing JBoss Tools
In order to install JBoss Tools make sure you have installed the latest Eclipse release. Next, move to the Help | Eclipse Market Place and enter in the search box “JBoss Tools”. You will see several JBoss Tools releases available. Choose to install or update the latest stable JBoss Tools plugin:
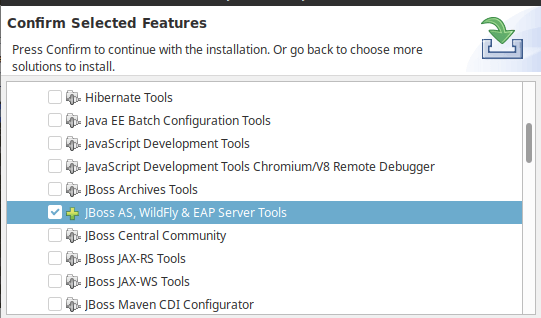
In the following screen select the “JBoss AS, WildFly & EAP Server tools” plug-in and restart Eclipse once completed.
Next, choose from the upper Menu: File | New | Server and expand the JBoss Community option. You will see the “WildFly” Server is available:
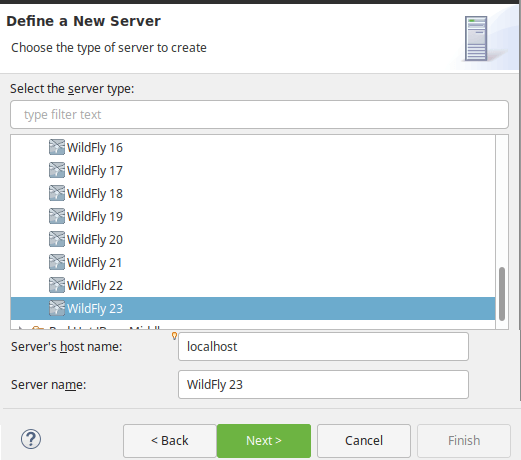
In the current version of JBoss Tools plugin for eclipse you will see as latest version “WildFly 24+“. You can obviously use that for any release equal or greater than WildFly 24. In most cases, there is no strict requirement to match the exact server version.
Next, you have to choose if the Server is locally installed (Local) or it’s a remote server (Remote) and how you are managing the Server Lifecycle:

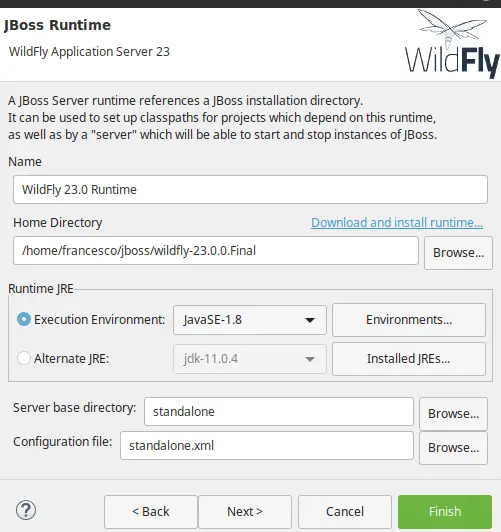
Finally, point to the installation folder of the following items:
- WildFly Home directory
- Runtime JRE that you will use for the execution
- Server base directory and configuration file name
The following picture shows the above options::
Click Finish. The configuration of WildFly in Eclipse is complete!

Click on the Icons in the toolbar to Debug / Start / Profile / Stop your Server. Right click on it and choose “Add or Remove ” to Deploy applications on it.
Running JBoss Tools with Java 16 or newer
Since Java 16 all Java internals are by default strongly encapsulated. This forbids external access from reflection. In particular, you will see exceptions for modules that are attemempting to initialize Classes via reflection. Example:
Could not initialize class org.wildfly.security.auth.client.DefaultAuthenticationContextProvider
To circumvent this issue you need to open the above module for external access.
Make sure that eclipse.ini includes the following option, which will be added to the JVM startup parameters:
--add-opens=java.base/java.security=ALL-UNNAMED
Sometimes your application server requires to deploy a large number of artifacts, which in turn might access external resources. Therefore, it is common that the server start up will take some time.
How to manage WildFly from Eclipse
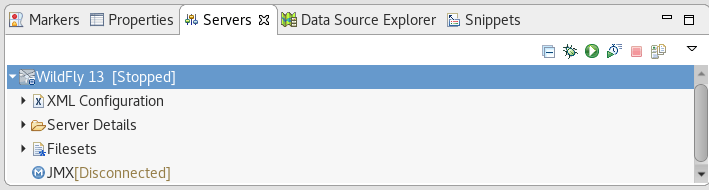
To manage the application server with ease, get familiar with the following icons in the Eclipse tool bar:
![]()
(1) Select the server version – in case you have installed multiple AS version
(2) Start the application server
(3) Debug the application server
Additionally, you can choose from the Menu: Window | Show View | Server
The following tab GUI will be accessible to start/stop/debug and deploy applications on JBoss AS.
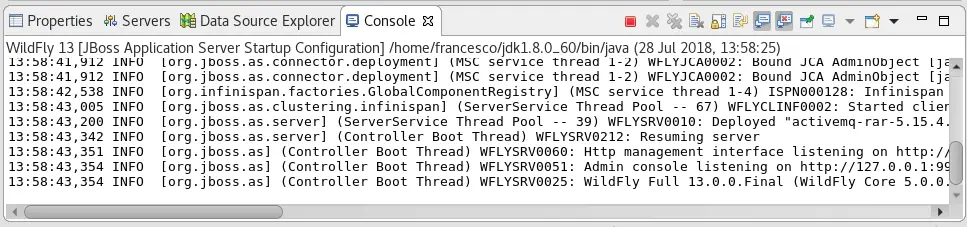
Finally, let’s try to start the server. Right click on the Server icon and choose “Start” from the Menu.
The Console Tab GUI will activate, showing the server boot logs. At the end of the process, the Console will display f the server started correctly.
How to debug your applications running on JBoss AS / WildFly.
The simplest way to debug your Java EE applications on JBoss AS / WildFly is starting the server from within Eclipse in Debug mode. Simply right click on the Server icon and choose “Debug“. Once that the compiled code hits a breakpoint, the Debug perspective view will kick in.
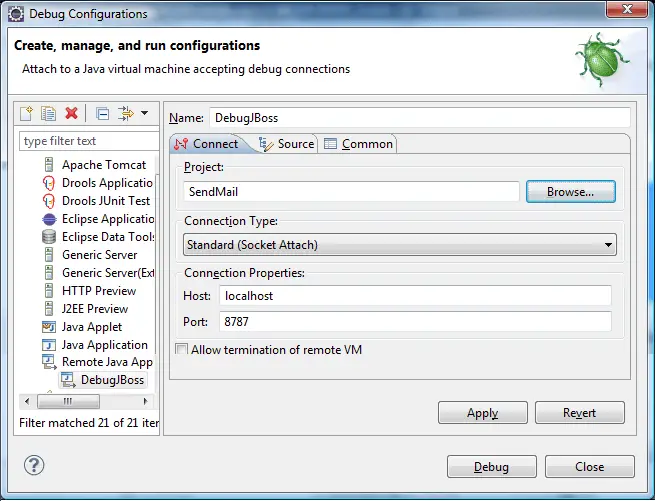
The other way to debug, is called remote debugging and happens if you are running JBoss AS on a separate process. In order to remotely debug JBoss AS, set this properties in the AS start script (standalone.conf):
JAVA_OPTS="$JAVA_OPTS -agentlib:jdwp=transport=dt_socket,address=8787,server=y,suspend=n"
In the Debug configuration, create a new Remote Java Application node.
In the Connection Properties, specify localhost as the Host and specify the Port as the port that was specified in the run batch script of the JBoss server, 8787.
To learn more about remote debugging of WildFly, we recommend checking this article: How to debug remotely WildFly
Conclusion
In this tutorial, we covered the steps required to configure Eclipse to use Wildfly. We installed Wildfly, installed the JBoss Tools plugin for Eclipse, created a new server, configured the server, and started the server. With these steps, you should now be able to use Eclipse to develop and deploy applications on the Wildfly server.