The Keycloak REST API is a Web service Endpoint that allows you to manage Keycloak using a REST channel. It provides endpoints for creating, updating, and deleting Keycloak entities such as users, groups, clients, roles, and realms. You can use any programming language that supports HTTP requests to interact with the API.
Pre-requisite: If you are new to Keycloak, we recommend checking this article for a quick heads up about Keycloak Identity Manager: Keycloak tutorial for beginners
Getting started with Keycloak Admin API
For the purpose of getting started, you can just kick-off Keycloak using the Docker Image:
docker run --rm --name keycloak_dev -p 8080:8080 -e KEYCLOAK_ADMIN=admin -e KEYCLOAK_ADMIN_PASSWORD=admin quay.io/keycloak/keycloak:latest start-dev
Then, to run the REST API we need to use the Keycloak Admin CLI which is a Client interface to Keycloak resources. You can find it under the Client section of your Realms under the name “admin-cli”:
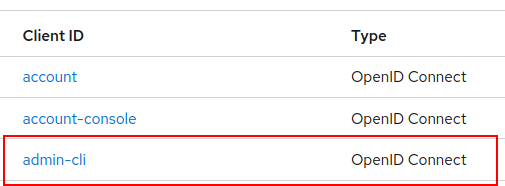
By using the admin-cli Client you can access and manage Keycloak using the language neutral REST API. Before accessing the admin-cli Client, enable Client Authentication in the main Client settings:

Then, take note of the Credentials for the admin-cli Client:

Then, we will collect a JWT token using the Admin credentials and the admin-cli credentials. The JWT token by default will expiry in 1 minute so, for the purpose of this tutorial, we recommend extending the Access Token Lifespan from the Realm settings:

Next, let’s fetch a JWT token with the following bash command:
export access_token=$(curl --insecure -X POST http://localhost:8080/realms/master/protocol/openid-connect/token --user admin-cli:17XltshmI3NS7oszVzYKigchmUBJcojU -H 'content-type: application/x-www-form-urlencoded' -d 'username=admin&password=admin&grant_type=password' | jq --raw-output '.access_token' )
Finally, verify that the access_token variable contains the actual Token for the Administrator user:
echo $access_token
eyJhbGciOiJSUzI1NiIsInR5cCIgOiAiSldUIiwia2lkIiA6ICJIeTZ1OFV6aFk2aVpuRXhSTUJ1QkRmb3V3WnZRaGNHYnJYSC0xb0tZbDJVIn0.eyJleHAiOjE2Nzg0NjM4MjQsImlhdCI6MTY3ODQ2MzIyNCwianRpIjoiMTRlOTEwYWYtMTg5YS00YTczLThiYzUtMzE1NzczZDI1ZDhkIiwiaXNzIjoiaHR0cDovL2xvY2FsaG9zdDo4MDgwL3JlYWxtcy9tYXN0ZXIiLCJzdWIiOiJkNGM3NDIyZC0yZDIzLTQzNjQtOGJjNi05Mjk4MTY3MzhiZmMiLCJ0eXAiOiJCZWFyZXIiLCJhenAiOiJhZG1pbi1jbGkiLCJzZXNzaW9uX3N0YXRlIjoiNmJkNzg4N2ItNzZiYi00Yjc3LWJhYmYtOGM5NmNhMTY5ZGU2IiwiYWNyIjoiMSIsInNjb3BlIjoicHJvZmlsZSBlbWFpbCIsInNpZCI6IjZiZDc4ODdiLTc2YmItNGI3Ny1iYWJmLThjOTZjYTE2OWRlNiIsImVtYWlsX3ZlcmlmaWVkIjpmYWxzZSwicHJlZmVycmVkX3VzZXJuYW1lIjoiYWRtaW4ifQ.bCOKTedsTjeQvCNUj-YQgIuB4P6LIxnnSoj4M2M1VKPXwegP5aust2r8k2JqHpT63DkYaGJGbqzqzu36lpCgXGJQ7TjPJ5MvL1Zs2POJwE6V2E7HD86uJwPiKhT7nbS4KAkz5bR3iOsTh0QbeeNO7IhD0qxmof6SmeKCkSrzRGw1oldo_9lYP_16plyjNtoBTM4nIf0QREOVe_Jto0utaVpe996YINIDkQu8HNmFp43C_URGKIEqP4MlWpImYu-hr5vr-ol-q_lGaAJ6ov0-uzta7BK5Sj8KkQbCWQIMaoroaEy7QZBqNYViTpxyQoCEtv_bUmlLNVmqG8f1h7OKMQ
Managing Keycloak Realm
Once that you have the Admin Token, we will start managing our Keycloak server. Firstly, we will create another Realm where we will create some Users.
The main reference for Keycloak Admin API is available at: https://www.keycloak.org/docs-api/22.0.1/rest-api/index.html
To create a new Realm, we need to run a POST to Keycloak Admin URL (http://localhost:8080/admin/realms) with a JSON Body which contains the Realm Name. For example:
curl -X POST -k -g -H "Authorization: Bearer $access_token" "http://localhost:8080/admin/realms" -H "Content-Type: application/json" --data '{"id": "testrealm","realm": "testrealm","accessTokenLifespan": 600,"enabled": true,"sslRequired": "all","bruteForceProtected": true,"loginTheme": "keycloak","eventsEnabled": false,"adminEventsEnabled": false}'
Notice that we need to include in the Authorization: Bearer Header the Token that we have copied into the $access_token variable.
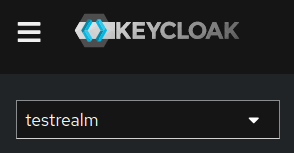
You can check on the Keycloak console that your Server now includes the Realm “testrealm“:
Next, we will add an User to the Realm. The API to add a new User you can execute a POST http://localhost:8080/admin/realms/<realm>/users with a JSON Payload which contains details about the User.
For example, the following curl command will create the user “frank”:
curl -k -X POST http://localhost:8080/admin/realms/testrealm/users -H "Content-Type: application/json" -H "Authorization: Bearer $access_token" --data '{ "username": "frank", "enabled": true, "realmRoles": [ "user", "offline_access" ], "attributes": { "uid": ["4010"], "homedir": ["/home/frank"], "shell": ["/sbin/nologin"] } }'
Next, verify on the Console that the user is available in the Realm:

To list Users in your testrealm you can run a GET http://localhost:8080/admin/realms/<realm>/users as follows:
curl -k -X GET http://localhost:8080/admin/realms/testrealm/users -H "Authorization: Bearer "$access_token | jq
The above REST API returns the following JSON output:
{
    "id": "d0375203-631f-4c32-8fad-bc4482be3c29",
    "createdTimestamp": 1678462584187,
    "username": "frank",
    "enabled": true,
    "totp": false,
    "emailVerified": false,
    "attributes": {
      "uid": [
        "4010"
      ],
      "shell": [
        "/sbin/nologin"
      ],
      "homedir": [
        "/home/frank"
      ]
    },
    "disableableCredentialTypes": [],
    "requiredActions": [],
    "notBefore": 0,
    "access": {
      "manageGroupMembership": true,
      "view": true,
      "mapRoles": true,
      "impersonate": true,
      "manage": true
    }
  }
Then, let’s try another command, to modify the password for the user “frank”. The command is PUT http://localhost:8080/admin/realms/<realm>/users/<user-id>/reset-password :
curl -k -X PUT http://localhost:8080/admin/realms/testrealm/users/d0375203-631f-4c32-8fad-bc4482be3c29/reset-password -H "Content-Type: application/json" -H "Authorization: bearer $access_token" --data '{ "type": "password", "temporary": false, "value": "my-new-password" }'
Finally, the command to delete an user is DELETE http://localhost:8080/admin/realms/<realm>/users/<userid> . In our example:
curl -k -X DELETE http://localhost:8080/admin/realms/testrealm/users/d0375203-631f-4c32-8fad-bc4482be3c29 -H "Content-Type: application/json" -H "Authorization: bearer $access_token"
Conclusion
The Keycloak REST Admin API is handy option to manage Keycloak using any interface or language that supports HTTP requests to interact with the API.