In the second tutorial about LDAP and WildFly we will learn how to create an LDAP based User Federation configured on Keycloak.
If you are new to Keycloak please refer to the base documentation: http://keycloak.jboss.org/docs. We have also provided two tutorials which could be a good start as well:
Keycloak can federate external user databases. Out of the box there’s support for LDAP and Active Directory.
Shortcut!
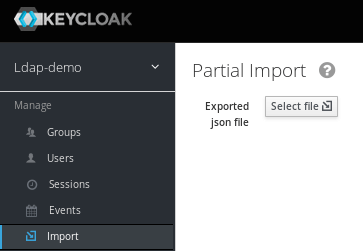
If you want to get started quickly, simply import the Ldap-demo Realm which is available on GitHub: https://github.com/keycloak/keycloak/blob/master/examples/ldap/ldaprealm.json.
Next move to “Configure your Web application” section.
Configuring LDAP User Federation
In order to configure a federated LDAP store go to the Keycloak admin console: http://localhost:8080/auth/admin
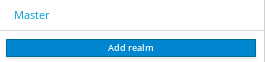
You should start creating a new Realm to be used by your applications:
Next, select your Realm and click on the Users Federation menu option to get you to the User Federation page. When you get to this page, there is an “Add Provider” select box. You should see “ldap” within this list. Selecting “ldap” will bring you to the ldap configuration page. We will add here the ApacheDS LDAP settings, which are the same we have covered in the first tutorial:

Verify at fist that the connection is OK by clicking on the Test connection. Next verify also the authentication against the default ApacheDS bind DN: “uid=admin,ou=system”
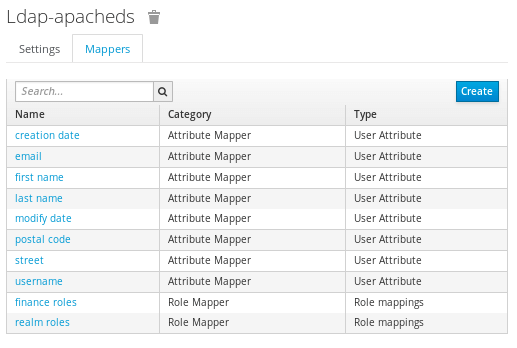
Mappers
Out of the box, Keycloak is configured to import only username, email, first and last name, but you are free to configure mappers and add more attributes or delete default ones. It supports password validation via LDAP/AD protocols and different user metadata synchronization modes.
Here is the full list of attributes for our schema:
Clients configuration
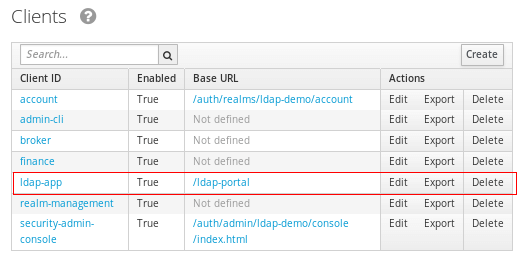
Complete your configuration by generating a Client which will let you generate and install the configuration on your application. From the Clients menu, click on create an choose a Base URL for your application, such as “ldap-portal“.
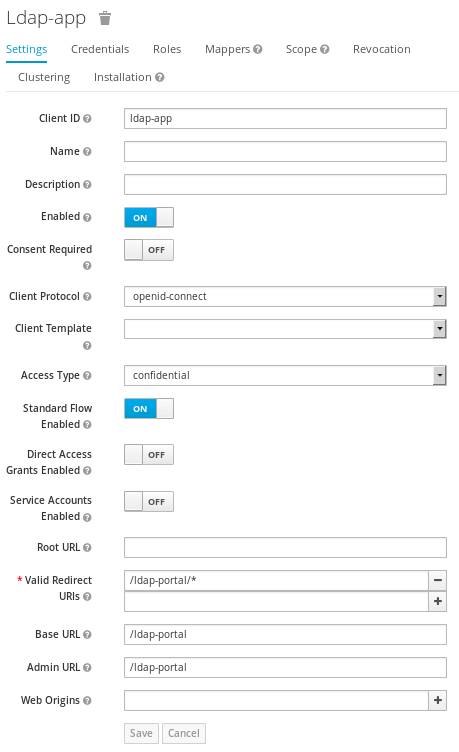
Save your configuration. Next step will be Exporting the client configuration in JSON or XML format. Click on the ldap-app:
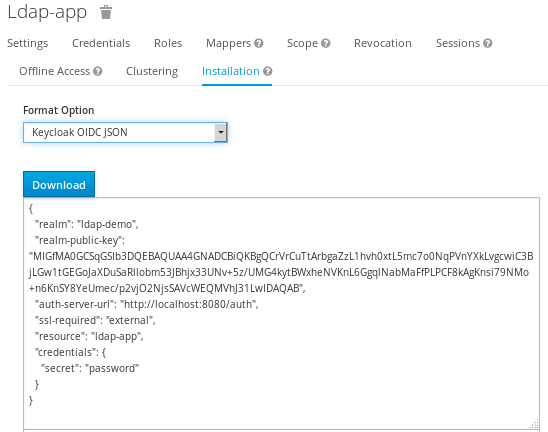
Select the Installation tab and the Format Option (in our case JSON). Once done, click on Download and save it locally with a name such as keycloak.json.
Configure your Web application
Configuring your Web application requires two simple steps:
- Include in the WEB-INF folder the keycloak.json generated from the Keycloak. (Also available here: https://github.com/keycloak/keycloak/blob/master/examples/ldap/src/main/webapp/WEB-INF/keycloak.json)
- Next, include in your web.xml as auth-method KEYCLOAK and as role-name ldap-user
<web-app xmlns="http://java.sun.com/xml/ns/javaee"
         xmlns:xsi="http://www.w3.org/2001/XMLSchema-instance"
         xsi:schemaLocation="http://java.sun.com/xml/ns/javaee http://java.sun.com/xml/ns/javaee/web-app_3_0.xsd"
         version="3.0">

    <module-name>ldap-portal</module-name>

    <security-constraint>
        <web-resource-collection>
            <web-resource-name>LDAPApp</web-resource-name>
            <url-pattern>/*</url-pattern>
        </web-resource-collection>
        <auth-constraint>
            <role-name>ldap-user</role-name>
        </auth-constraint>
    </security-constraint>

    <login-config>
        <auth-method>KEYCLOAK</auth-method>
        <realm-name>does-not-matter</realm-name>
    </login-config>

    <security-role>
        <role-name>ldap-user</role-name>
    </security-role>
</web-app>
Now test an Test the example. In your web browser point to http://localhost:8080/ldap-portal . You can login either as jbrown with password password or as bwilson with password password . You can see that access token contains all the claims and role mappings corresponding to the LDAP data provided in LDIF.