This is a two-part tutorial about using LDAP on WildFly application server. In this first one we will learn how to configure the management console to use LDAP for authentication. In the next one we will learn how to use KeyCloak to authenticate and authorize application users against the LDAP server.
We will use ApacheDS as LDAP server. The simplest way to get started is downloading ApacheDS Studio which features a rich Eclipse based IDE and an embedded server: https://directory.apache.org/studio/downloads.html
Once downloaded, start ApacheDS studio and launch the ApacheDS server:

Now create a new connection using the default parameters:
- Host: localhost
- Port 10389
- User: uid=admin,ou=system
- Password: secret
The next thing we will do is creating an LDAP partition. As I want to use the partition dc=keycloak,dc=org, we need to create it. You can easily do it through ApacheDS, by clicking on the Add button:

Now import a set of users that will let you authenticate. Here is a sample LDIF script taken from https://github.com/keycloak/keycloak/blob/master/examples/ldap/ldap-example-users.ldif
dn: ou=People,dc=keycloak,dc=org
objectclass: top
objectclass: organizationalUnit
ou: People

dn: ou=RealmRoles,dc=keycloak,dc=org
objectclass: top
objectclass: organizationalUnit
ou: RealmRoles

dn: ou=FinanceRoles,dc=keycloak,dc=org
objectclass: top
objectclass: organizationalUnit
ou: FinanceRoles

dn: uid=jbrown,ou=People,dc=keycloak,dc=org
objectclass: top
objectclass: person
objectclass: organizationalPerson
objectclass: inetOrgPerson
uid: jbrown
cn: James
sn: Brown
mail: [email protected]
postalCode: 88441
userPassword: password

dn: uid=bwilson,ou=People,dc=keycloak,dc=org
objectclass: top
objectclass: person
objectclass: organizationalPerson
objectclass: inetOrgPerson
uid: bwilson
cn: Bruce
sn: Wilson
mail: [email protected]
postalCode: 88441
postalCode: 77332
postalCode: 66221
street: Elm 5
userPassword: password

dn: cn=ldap-user,ou=RealmRoles,dc=keycloak,dc=org
objectclass: top
objectclass: groupOfNames
cn: ldap-user
member: uid=jbrown,ou=People,dc=keycloak,dc=org
member: uid=bwilson,ou=People,dc=keycloak,dc=org

dn: cn=ldap-admin,ou=RealmRoles,dc=keycloak,dc=org
objectclass: top
objectclass: groupOfNames
cn: ldap-admin
member: uid=jbrown,ou=People,dc=keycloak,dc=org

dn: cn=accountant,ou=FinanceRoles,dc=keycloak,dc=org
objectclass: top
objectclass: groupOfNames
cn: accountant
member: uid=bwilson,ou=People,dc=keycloak,dc=org
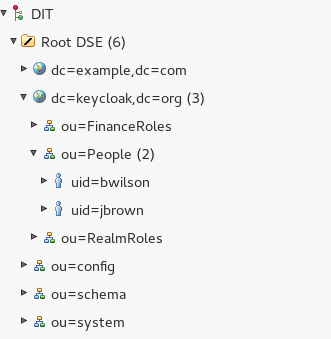
Now Choose File | Import LDIF into LDAP. Point to the ldif file. At the end, the following structure will be created with two users loaded in the o.u. “People”:

Great, now let’s configure WildFly to use these users for accessing to the management console. The first change will be creating a new Realm named LDAP Realm which contains a base-dn (“ou=People,dc=keycloak,dc=org“) where users are stored and the prefix to them (in our case “uid“). We need also to define an outbound connection for the initial connection to the LDAP. We can use the default connection String for this purpose:
<security-realms>
               . . .
               <security-realm name="LDAPRealm">
                 <authentication>
                    <ldap connection="ldapconnection" base-dn="ou=People,dc=keycloak,dc=org">
                       <username-filter attribute="uid"/>
                    </ldap>
                 </authentication>
             </security-realm>

</security-realms>
<outbound-connections>
	   <ldap name="ldapconnection" url="ldap://localhost:10389" search-dn="uid=admin,ou=system" search-credential="secret"/>
</outbound-connections>
Last change, is setting the LDAPRealm on the management-interfaces:
<management-interfaces>
            <http-interface security-realm="LDAPRealm" http-upgrade-enabled="true">
                <socket-binding http="management-http"/>
            </http-interface>
</management-interfaces>
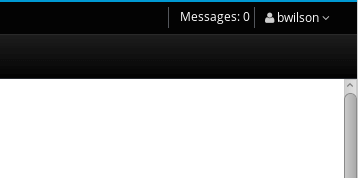
Now start WildFly and check the you are able to log in the management console (http://localhost:9990 by default) with any of the two users you have created.

In the next tutorial LDAP and WildFly part 2: Using Keycloak we will learn how to manage your application authentication and authorization on LDAP through KeyCloak server. Stay tuned!
Found the article helpful? if so please follow us on Socials