In the fast-paced world of Java application development, having a seamless and efficient deployment process is crucial. Maven, a powerful build automation tool, coupled with the WildFly plugin, offers a robust solution to streamline the deployment of your Java applications. This tutorial serves as a comprehensive guide to configuring the Maven WildFly plugin, equipping developers with the knowledge to optimize their deployment workflow and maximize productivity.
Configuring WildFly plugin in Maven
Disambiguation: there are currently two WildFly Maven plugins available.

1. WildFly Maven plugin: you can use it to deploy/configure applications on WildFly application server. This tutorial covers it.

2. WildFly Bootable Jar Maven plugin: you can use it to combine the server runtime and the application in runnable JAR (More about this plugin here: How to deploy WildFly Bootable jar on OpenShift )
In order to use WildFly Maven plugin, here is the build section that you should add in every of your WildFly project:
<plugin>
	<groupId>org.wildfly.plugins</groupId>
	<artifactId>wildfly-maven-plugin</artifactId>
	<version>${wildfly.plugin.version}</version>
	<configuration>
		<filename>${project.build.finalName}.war</filename>
	</configuration>
</plugin>
Replace the plugin version with the one you will use in your project. The latest version of the plugin (May 2026) is version 6.0.0.Beta3
As you can see, this plugin allows the configuration of some options. Firstly, you can override the artifact name by setting the filename element within the configuration section. We will later see some extra configuration options you can plug in.
Once that you have configured the WildFly plugin, you can use it to deploy/undeploy or redeploy your applications by passing the appropriate Maven goal. In order to deploy your project, you can run the following Maven goal:
mvn wildfly:deploy
Deploying to a remote server
Out of the box, WildFly Maven plugin will attempt to deploy your project on localhost at the default port (9990). To change the default values you can set the hostname, port, username and password within the configuration section.
For example:
<configuration>
   <hostname>myhost</hostname>
   <port>9990</port>
   <username>administrator</username>
   <password>Password1!</password>
</configuration>
Using WildFly plugin for integration tests
One interesting new feature of WildFly Maven plugin is the ability to use it for integration tests, for example, download WildFly from your Maven repository, for example: https://repository.jboss.org/nexus/content/groups/public/org/wildfly/wildfly-dist/
In the following example, we are downloading WildFly 14.0.1 and passing some start up arguments to the Server at boot. Next, in the execution block we are starting the server and deploying the demo.war application on top of it:
<configuration>
	<artifact>org.wildfly:wildfly-dist:wildfly-dist-14.0.1.Final.zip</artifact>
	<java-opts>
		<java-opt>-Dmyproperty=true</java-opt>
	</java-opts>
</configuration>
<executions>
   <execution>
	<id>start-wf</id>
	<goals>
        	<goal>start</goal>
		<goal>deploy</goal>
	</goals>
	<phase>pre-integration-test</phase>
	   <configuration>
		<filename>demo.war</filename>
	</configuration>
   </execution>
Much the same way, you can add a shutdown goal in another execution to stop the server at the end of your tests:
<execution>
   <id>stop-wf</id>
	<goals>
		<goal>shutdown</goal>
	</goals>
	<phase>post-integration-test</phase>
</execution>
You will obviously need to drive your integration tests from your Maven fail safe plugin or equivalent:
<plugin>
	<groupId>org.apache.maven.plugins</groupId>
	<artifactId>maven-failsafe-plugin</artifactId>
	<version>2.19.1</version>
	<configuration>
		<testClassesDirectory>${project.build.testOutputDirectory}</testClassesDirectory>
		<includes>
			<include>**/*ITest*</include>
		</includes>
	</configuration>
	<executions>
		<execution>
			<goals>
				<goal>integration-test</goal>
				<goal>verify</goal>
			</goals>
		</execution>
	</executions>
</plugin>
Efficient application deployment
The following example shows how to deploy the MySQL JDBC Driver. It is first defined as a dependency in your pom.xml, then the artifact is referenced in the configuration block:
. . . .
      <dependency>
         <groupId>mysql</groupId>
         <artifactId>mysql-connector-java</artifactId>
         <version>5.1.29</version>
      </dependency>
. . . .
         <plugin>
            <groupId>org.wildfly.plugins</groupId>
            <artifactId>wildfly-maven-plugin</artifactId>
            <version>2.0.0.Final</version>
            <configuration>
               <groupId>mysql</groupId>
               <artifactId>mysql-connector-java</artifactId>
               <fileName>mysql-connector-java-5.1.29-bin.jar</fileName>
               <executions>
                  <execution>
                     <id>deploy-driver-MySQL</id>
                     <phase>package</phase>
                     <goals>
                        <goal>deploy-artifact</goal>
                     </goals>
                     <configuration />
                  </execution>
               </executions>
               <filename>${project.build.finalName}.war</filename>
            </configuration>
         </plugin>
      </plugins>
   </build>
</project>
In order to deploy the JDBC driver simply execute:
mvn wildfly:deploy-artifact
Starting and stopping the application server
The WildFly Maven plugin plugin also allows to start and stop the application server. In the following configuration example we show how to customize the startup of the server by including a configuration file and JVM arguments:
<plugin>
	<groupId>org.wildfly.plugins</groupId>
	<artifactId>wildfly-maven-plugin</artifactId>
	<version>4.0.0.Final</version>
	<configuration>
		<serverConfig>standalone.xml</serverConfig>
		<jvmArgs>-Djboss.socket.binding.port-offset=100</jvmArgs>
		<filename>${project.build.finalName}.war</filename>
	</configuration>
</plugin>
Use mvn wildfly:start to start the application server and mvn wildfly:stop to stop it.
Executing CLI commands before deployment
Sometimes it is necessary to create/delete some resources before executing a deployment. You can include a CLI command to be executed before deployment in the following way:
<configuration>
   <beforeDeployment>
     <commands>
       <command>/subsystem=messaging-activemq/server=default/jms-queue=demoQueue:add(entries=["java:/jms/queue/testQueue"])</command>
     </commands>
   </beforeDeployment>
</configuration>
Executing a CLI script from the plugin
If you need to execute a more complex list of CLI commands, then you can use the execute-commands goals to execute some commands which can be contained in the pom.xml file or maintained in a separate file. In this example we are executing CLI commands contained into a file named commands.cli:
<plugin>
	<groupId>org.wildfly.plugins</groupId>
	<artifactId>wildfly-maven-plugin</artifactId>
	<version>4.0.0.Final</version>
	<configuration>
		<execute-commands>
				<scripts>
					<script>commands.cli</script>
				</scripts>
		</execute-commands>
		<filename>${project.build.finalName}.war</filename>
	</configuration>
</plugin>
Execute the CLI commands with:
mvn wildfly:execute-commands
Deploying to a domain
If you are going to deploy your applications on a domain of servers, include a domain element with the list of server groups where you will deploy your applications:
<configuration>
   <domain>
      <server-groups>
         <server-group>main-server-group</server-group>
      </server-groups>
   </domain>
</configuration>
Provisioning WildFly with its Maven plugin
Finally, if you are using version 4.0.0 or newer of WildFly’s Maven plugin, you can also provision a built-in WildFly installation which contains the target application it it.
To do that, you need to add to your configuration element the Galleon feature pack for the WildFly installation. For example, to provision a WildFly 26.1.1 installation you need to reference the org.wildfly:wildfly-galleon-pack:26.1.1.Final.
Here is a sample configuration:
<plugin>
  <groupId>org.wildfly.plugins</groupId>
  <artifactId>wildfly-maven-plugin</artifactId>
  <version>4.1.0.Final</version>
  <configuration>
    <feature-packs>
      <feature-pack>
        <location>org.wildfly:wildfly-galleon-pack:28.0.0.Final</location>
      </feature-pack>
    </feature-packs>
  </configuration>
  <executions>
    <execution>
      <goals>
        <goal>package</goal>
      </goals>
    </execution>
  </executions>
</plugin>
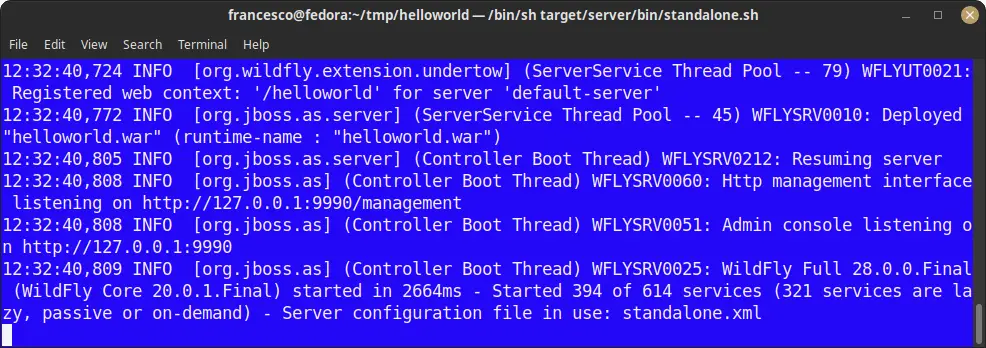
With that configuration in place, as you run mvn package, there will be a target/server directory that contains WildFly and the application deployment. Therefore, you can start WildFly from this directory with the application deployed in it:
$ mvn clean package

$ ./target/server/bin/standalone.sh
Conclusion
By mastering the configuration of the Maven WildFly plugin, you have empowered yourself with a powerful toolset to streamline and optimize your Java application deployment. Leveraging Maven’s build automation capabilities and the seamless integration with the WildFly plugin, you can ensure consistent and reliable deployment across environments. Incorporating best practices such as efficient dependency management, leveraging Maven profiles, and performance optimization with WildFly, you can enhance your deployment workflow and maximize revenue potential. With the growing demand for CI/CD practices, mastering the Maven WildFly plugin configuration positions you at the forefront of efficient application deployment.