Keycloak themes are a powerful way to customize the appearance and behavior of a Keycloak installation. In this article we will learn how to create a custom Keycloak theme with a baisc CSS knowledge.
Keycloak Themes in a nutshell
Firstly, a Keycloak theme is a set of resources that defines the look and feel of the Keycloak login and registration pages, as well as other pages within the Keycloak application. You can use themes to customize the colors, fonts, and layout of these pages, as well as to add custom JavaScript and CSS code to alter the behavior of the pages.
You can create a Theme from scratch, or you can leverage on one of the built-in Keycloak themes.
Behind the hoods, Keycloak uses Freemarker, which is a template engine that you can use to generate dynamic HTML, XML, or other text-based formats.
Keycloak uses a set of predefined templates to render the various pages within the application.
The default Keycloak themes are packaged inside the org.keycloak.keycloak-themes-<version>.jar file, within the $KEYCLOAK_HOME/lib/lib/main folder. Here is the list of themes which are built-in:
- base
- keycloak
- keycloak.v2
Then, inside each theme you can find the following folders, which you can use to create custom UI for each Keycloak authentication flow:
- account: This folder contains the definitions for the account console
- admin: This folder contains the definitions for the administration console
- common: This folder contains common resources used across theme types
- email: This folder contains the UI for emails
- login: This folder contains the UI for login-related pages, including pages for updating profiles, resetting passwords, and so on
- welcome: Contains the definitions for the welcome page
Now that you have a basic understanding of the default Keycloak themes, in order to create a custom one you have the following options:
- Create your own versions of these templates using Freemarker syntax and add static content to it.
- Extend the existing keycloak themes, modifying the static content (CSS/images/Javascript) to customize the appearance and behavior of the pages. This is very handy if you just want to make punctual changes to an existing theme.
In this article we will extend the basic Keycloak Templates. In another article we will show a more advanced example of how to create a new set Freemarker templates from scratch.
Anatomy of a Theme
Firstly, you need to understand the structure of a Keycloak theme. Consider the following example:
src
└── main
    ├── java
    └── resources
        ├── META-INF
        │   ├── keycloak-themes.json
        │   └── services
        └── theme
            └── acme
                └── login
                    ├── resources
                    │   ├── css
                    │   │   ├── bootstrap.min.css
                    │   │   ├── bootstrap.min.css.map
                    │   │   └── signin.css
                    │   └── img
                    │       ├── favicon.ico
                    │       ├── keycloak-bg.png
                    │       └── keycloak-logo.png
                    └── theme.properties
Besides the static content files, there are two main configuration file in a Keycloak theme:
- The META-INF/keycloak-themes.json
- The theme/<theme-name>/theme.properties
Let’s see what is inside these files.
Inside the theme.properties
Firstly, the theme.properties file is a configuration file used to customize the appearance and behavior of a Keycloak theme. It is a Java properties file that contains key-value pairs representing various settings for the theme.
Here is the content of this file:
parent=keycloak

# Define the CSS styles
styles=css/login.css css/bootstrap.min.css css/signin.css

meta=viewport==width=device-width,initial-scale=1

# Mapping styles from Keycloak to those defined in the custom css.
kcHtmlClass=login-page
kcLoginClass=form-signin
kcHeaderClass=login-header
kcLabelClass=form-label
kcFormCardClass=login-card
kcSignUpClass=login-signup
kcFormClass=form-signin
kcInputClass=form-control
kcButtonDefaultClass=w-100 btn btn-lg btn-primary
kcButtonClass=w-100 btn btn-lg btn-primary
kcFormGroupClass=form-floating
kcInfoAreaWrapperClass=login-info
kcFormHeaderClass=h3 mb-3 fw-normal
kcLocaleClass=pf-c-dropdown
kcLocaleMainClass=pf-c-dropdown locale-section
kcLocaleListClass=pf-c-dropdown__menu pf-m-align-right
kcLocaleItemClass=pf-c-dropdown__menu-item
kcLocaleDropDownClass=locale-dropdown
Firstly, notice the parent=keycloak . This property instructs the theme to inherit our login type from the keycloak base theme.
Then, the styles property contains the list of css that you will be using in the keycloak theme. We will be adding the login.css and signin.css on top of the compiled and minified version of the Bootstrap CSS framework.
Next, the meta property is a list of key-value pairs that provide additional information about the theme, such as its name, description, and version.
Finally, we are mapping the Keycloak CSS with the CSS Classes available in our files.
Inside the keycloak-themes.json
The keycloak-themes.json file is a JSON file that contains an array of objects, each representing a theme that is available to Keycloak. Each theme object has a number of properties that define various aspects of the theme, such as its name, display name, and the location of its resources on the file system.
In our example, we will simply define the theme name, which is “acme”:
{
  "themes": [{
    "name" : "acme",
    "types": [ "login" ]
  }]
}
A more advanced example which includes multiple templates with custom directory resources could be like that:
[
  {
    "name": "my-theme",
    "displayName": "My Theme",
    "directory": "/path/to/theme/resources"
  },
  {
    "name": "another-theme",
    "displayName": "Another Theme",
    "directory": "/path/to/another/theme/resources"
  }
]
Editing the CSS files
Finally, we will add a simple customization to the keycloak default theme. Firstly, we will add a background with a custom image in the body. Within the signin.css we will modify the body as follows:
body {
  display: flex;
  align-items: center;
  padding-top: 40px;
  padding-bottom: 40px;
  # Added
  background: url("../img/keycloak-bg.png") no-repeat center center fixed;
  background-size: cover;
}
Then, we will also add a custom logo in the login-header Class which will display on top of the Login Prompt:
.login-header {
    margin-bottom: 20px !important;
    display: -ms-flexbox !important;
    display: flex !important;
    -ms-flex-direction: column !important;
    flex-direction: column !important;
    color: #000000 !important;
    text-align: center;
    # Added
    background-image: url("../img/keycloak-logo.png") ;
}
To simplify the deployment of the theme on Keycloak, our project is a Maven project which produces a JAR file. In the next step, we will deploy and test in on Keycloak.
Deploying the Keycloak Theme
Let’s build our “acme” Keycloak theme:
mvn install
Then, we will copy the acme.jar into the providers folder of our Keycloak installation:
cp target/acme.jar $KEYCLOAK_HOME/providers
Finally, rebuild your configuration with the new Keycloak theme:
./kc.sh build
Updating the configuration and installing your custom providers, if any. Please wait.
2022-12-31 11:18:48,419 INFO  [io.quarkus.deployment.QuarkusAugmentor] (main) Quarkus augmentation completed in 4263ms
Then, launch Keycloak:
./kc.sh start-dev
To test our custom Theme, we recommend using an application realm. For example, create one using the following tutorial: Getting started with Keycloak powered by Quarkus
Then, select the wildfly-realm (from the example).
In your Client configuration, find the Login settings option and choose as Login theme your acme theme:
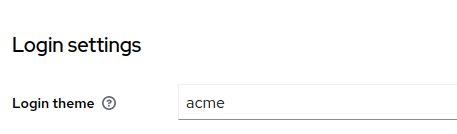
Click Save to persist the changes.
You can now access the wildfly-realm from any application. The login prompt (with your customizations) will show up:

Conclusion
Keycloak themes are a powerful way to customize the appearance and behavior of security checks. In this tutorial we have explored a simple way to extend the basic Keycloak theme with custom static files.
Source code for this article: https://github.com/fmarchioni/mastertheboss/tree/master/keycloak/keycloak-theme