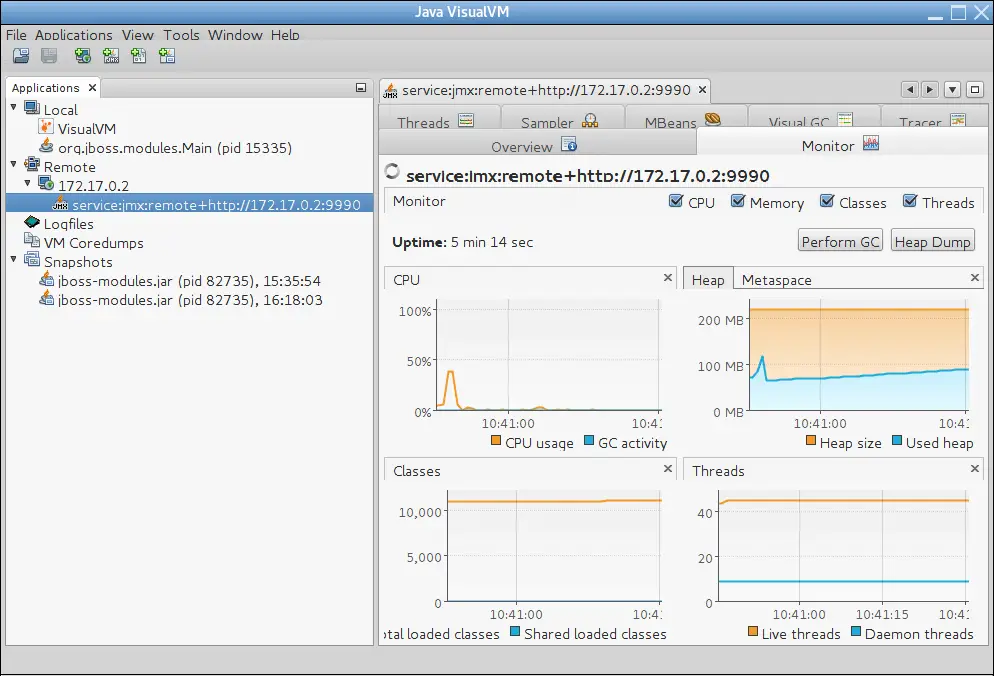
In the second tutorial about Container monitoring, we will learn how to monitor a Docker Container image of WildFly with JVisualVM
In the first tutorial Monitoring WildFly Container image – Part 1: JConsole we have learnt how to monitor a WildFly image running in a Container using JConsole. Let’s make a short recap:
We started with a sample Dockerfilewith this content:
FROM jboss/wildfly:latest

RUN /opt/jboss/wildfly/bin/add-user.sh admin1234 Password1! --silent

CMD ["/opt/jboss/wildfly/bin/standalone.sh", "-b", "0.0.0.0", "-bmanagement", "0.0.0.0"]
We have at first built the new layers with:
$ docker build --tag=wildfly-admin .
Next we have run the image as follows:
$ docker run -it -p 9990:9990 wildfly-admin
In the above command, we have tunneled port 9990, the management port, which needs to be reached by jvisualvm.
Let’s check which IP Address has been assigned to the WildFly image, with a combination of ‘docker ps’ and ‘docker inspect’:
$ docker ps
CONTAINER ID        IMAGE               COMMAND                  CREATED             STATUS              PORTS                              NAMES
1913f9e6909d        wildfly-admin       "/opt/jboss/wildfly/b"   2 minutes ago       Up 2 minutes        8080/tcp, 0.0.0.0:9990->9990/tcp   jolly_davinci

$ docker inspect --format '{{ .NetworkSettings.IPAddress }}' 1913f9e6909d0c7f3f5e37aaed1cb635ad113887b4c7b45c12e087e670ba447a
172.17.0.2
Now you need to launch jvisualvm. As opposite to JConsole, there is no patched jvisualvm script for WildFly so you will need to provide the required WildFly libraries to your class path to remotely monitor a WildFly JVM.
In order to do that, start VisualVM with the arguments for required libraries on your local machine:
$ visualvm -cp:a JBOSS_HOME/bin/client/jboss-cli-client.jar -J-Dmodule.path=JBOSS_HOME/modules
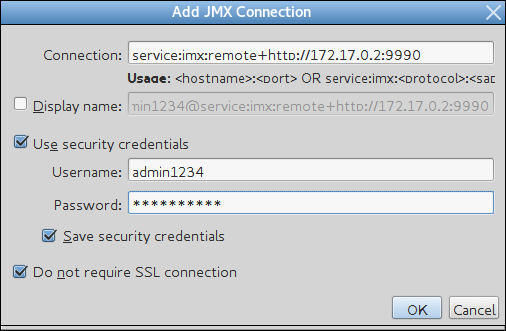
In the File menu, select Add JMX Connection and complete the details for your remote WildFly JVM just as we did with JConsole.
In the Connection field, insert the URI for the remote WildFly JVM process that to want to monitor (e.g. service:jmx:remote+http://172.17.0.2:9990).
Select the Use security credentials check box, and enter the user name and password for the monitoring connection. If you are not using an SSL connection, select the Do not require SSL connection check box.

Click OK and you are done with it!
