Deploying applications on WildFly using the management instruments (such as the Web console and the CLI) is the recommended choice for production environments.
This is also the only choice available if you are running the AS in domain mode or if you don’t have remote access to the deployments folder of a standalone distribution. Let’s see at first how to perform a standalone deployment:
Standalone Deployment using the Web interface
Deployments can be managed by selecting the Deployments upper tab of the Administration console. By Clicking on the (+) button a list of options will display:
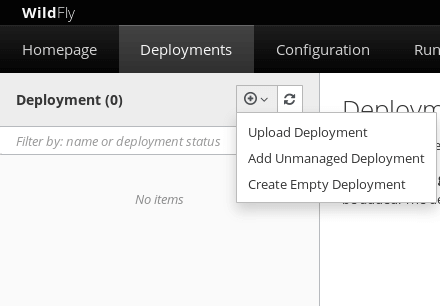
You can choose to Upload Deployment to upload a compressed archive. The option Add Unmanaged Deployment lets you upload a deployment from a folder of your file system. Finally the option Create Empty Deployment allows you to add an empty artifact to your deployments, in case you want to add content later.
Let’s choose the option Upload Deployment. In the next screen, you will be able to Drag and Drop your deployment in the window (if your browser supports Drag&Drop). Otherwise you will need to point to the filesystem location of your deployment:
TIP: Deployments added by drag and drop will be enabled by default.
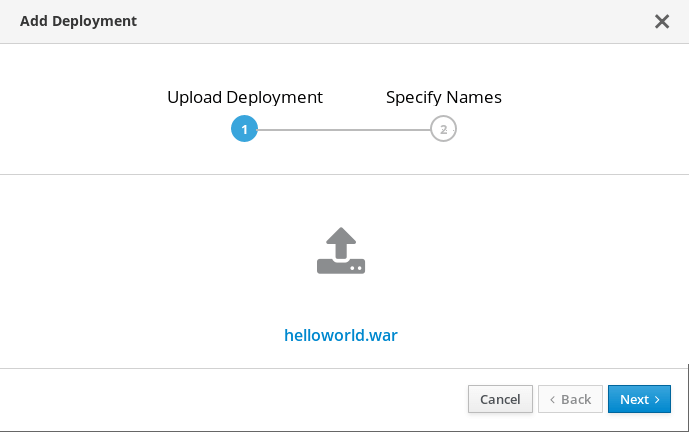
Click on Next to continue. In the following screen confirm the Name, Runtime Name of your deployment and if the application will be Enabled and click on Finish:
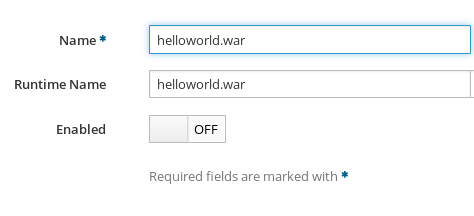
If your deployment completed successfully, it will be added in your Content Repository.
Now, by clicking again on the (+) button, a set of options will be available to control your deployment as you can see from the following picture:
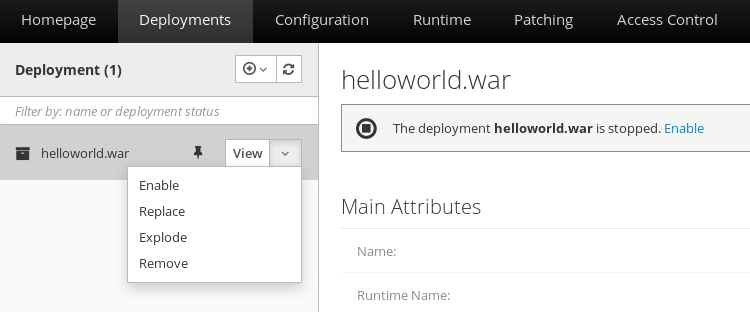
- Enable allows to enable your application if it was disabled.
- Disable swaps the status to disabled if it was enabled.
- Replace replace the deployment with a new one.
- Explode transforms the compressed deployment into exploded deployment.
- Remove removes the application from the repository.
Domain Deployment using the Web console
Domain deployment requires a few more steps: as a matter of fact, every deployment in Domain mode transition through a Content Repository, then it is assigned to a Server Group. Start by selecting the Deployments upper tab as shown by the following picture:

Now click on the (+) button and select Upload Content from the Combo. From there you can either Drag&Drop or select the archive from your file system:

Confirm the Name and Runtime Name of your deployment and click on Finish:

Now the application will be enlisted in the Content Repository. In order to assign your application to a Server Group, select it and from the Deployment Tab choose to “Deploy existing content”, as depicted by this screen:
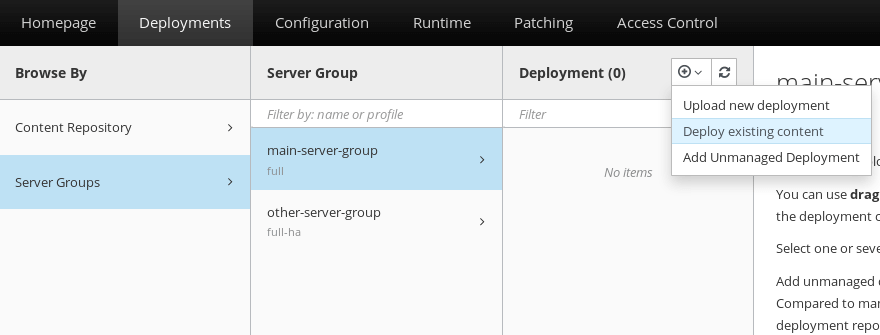
TIP: As you can see from the above picture, it is also possible to directly upload the application file and assign it to a Server Group by choosing Upload new deployment. This will speed up the deployment process.
In the next screen, you will choose which available application has to be deployed on the selected Server Group:
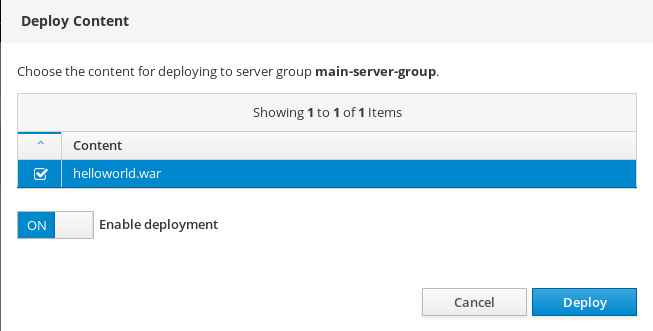
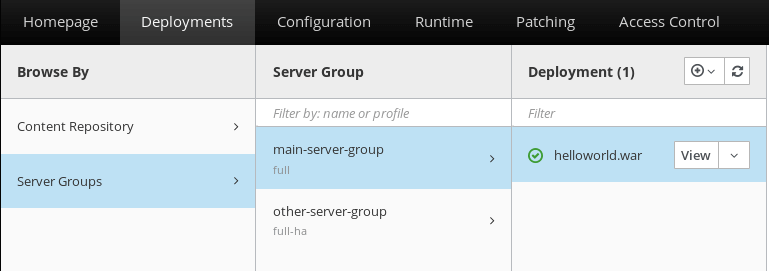
Click Deploy to complete deployment. Now the application has been deployed to the selected Server Group:
Deploying applications on WildFly using the CLI
Finally yet importantly, we will mention another valuable option for deploying your applications: the Command Line Interface. Although you might think that using a terminal to deploy an application is more tedious, I can promise you that at the end of this chapter it will take less time than a 100 meters Olympic final!
Let’s provide some proof of concept. The first thing we will learn is how to use the deploy command to deploy an application to a standalone server:
deploy /home/user1/myproject.war
Quite simple isn’t it? The great thing is that the file system paths are expandable (using the Tab key) therefore you can deploy an application just like if you are using your friendly bash shell!
The corresponding command to undeploy the application is obviously undeploy:
undeploy myproject.war
Again, you don’t need even to remember the application name you are going to undeploy. Just hit tab after typing “undeploy” as shown here:
undeploy
--headers=     --help         --path=        myproject.war
Re-deploying an application requires an additional flag (-f ) in order to force application redeployment:
deploy -f myproject.war
Finally, it’s worth mentioning that you can deploy an application also from a remote URL. Here is how to deploy the application named “helloworld.war” from my DropBox Public location:
deploy --url=https://dl.dropboxusercontent.com/u/9766485/helloworld.war --name=helloworld.war
Domain deployment using the CLI
As we already learned, when running in domain mode deployments are bound to one or more server groups. In order to deploy an application to all server groups in a domain you have to issue the following command:
deploy application.war --all-server-groups
On the other hand, if you want to deploy your application to one or more (comma separated) sever groups, use the –server-groups flag instead:
deploy application.war --server-groups=main-server-group
Un-deploying an application can be done as well on all server groups as follows:
undeploy application.war --all-relevant-server-groups
On the other hand,undeploying one application from a single (or a set) of server groups is a bit more troublesome. If the application is not available on the other server groups you can simply issue:
undeploy application.war --server-groups=main-server-group
On the other hand, if the application to be undeployed is available on other server groups, you need to force the deployer to perform a safe undeploy (i.e. without deleting the content) by issuing the following command:
undeploy application.war --server-groups=main-server-group --keep-contentFound the article helpful? if so please follow us on Socials