Note: This article reflects an old version of Openshift which has been deprecated. This is the latest updated tutorial on WildFly and Openshift: Running WildFly on Openshift
This tutorial will show how to deploy an application on Openshift Platform-as-a-Service (PaaS) cloud hosting using WildFly 8.1.0 cartridge.
OpenShift Express enables you to create, deploy, and manage applications within the cloud. It provides disk space, CPU resources, memory, network connectivity, and an Apache or JBoss server. Depending on the type of application you are building, you also have access to a template filesystem layout for that type (for example, PHP, WSGI, and Rack/Rails). OpenShift Express also generates a limited DNS for you.
The first thing needed to get started with OpenShift Express is an account, which can be obtained with a very simple registration procedure at: https://openshift.redhat.com/app/user/new/express
Once you’ve registered and confirmed your e-mail, the next step will be installing on your Linux distribution the client tools needed to deploy and manage your applications in the cloud.
Installing OpenShift client tools
For this purpose, we suggest you use either Fedora 14 (or higher) or Red Hat Enterprise 6 (or higher).
Then you need to grab a copy of the openshift.repo file, which contains the base URL of rpm files and keys necessary to validate them. This file should be available at: https://openshift.redhat.com/app/repo/openshift.repo . Now, copy this file into the /etc/yum.repos.d/ filesystem using either sudo or root access privileges:
$ sudo mv openshift.repo /etc/yum.repos.d/
And then install the client tools:
$ sudo yum install rhc
Creating a Domain of applications
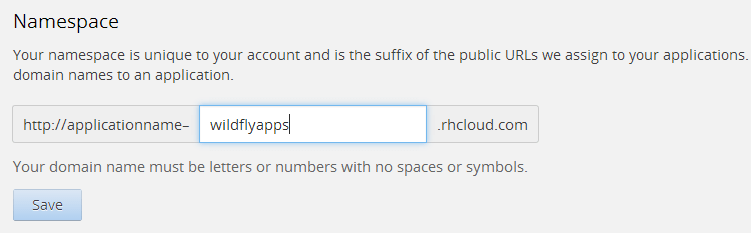
Once that you have registered, you need to create a domain which is a namespace where your applications will be deployed. This can be done from the Openshift console settings (https://openshift.redhat.com/app/console/settings) so move there and choose a domain name for your applications. In the following picture we have chosen “wildflyapps” as domain name:
Once created the domain, we will create an application. Move to the “applications” menu (https://openshift.redhat.com/app/console/applications) and choose to add a new application. Pickup an application which is based on WildFly 8 cartridge. For example we will be adding an application named “primedemo” where we are going to deploy our HelloWorld Primefaces demo.

In a couple of minutes your application will be created and listed in the Applications panel. Once created your app, a management username and password have been created for you. You can use them to log into the management tools and deploy your application within our primedemo cartridge.
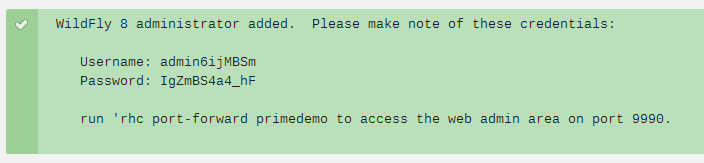
For example, if you want to access the Web console type as suggested in your shell:
$ rhc port-forward primedemo
Checking available ports ... done
Forwarding ports ...

To connect to a service running on OpenShift, use the Local address

Service Local OpenShift
------- -------------- ---- ----------------
java 127.0.0.1:8080 => 127.8.130.1:8080
java 127.0.0.1:9990 => 127.8.130.1:9990

Press CTRL-C to terminate port forwarding
So, as suggested log with your browser to http://127.0.0.1:9990
Enter the username/password that have been provided to you and here is your Openshift remote console: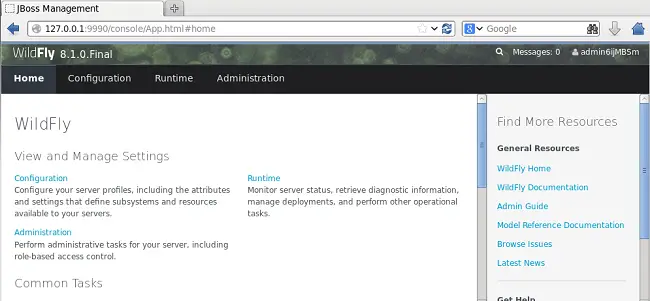
select the Runtime upper tab and from there choose Manage Deployments. Add your application and, when finished, enable them: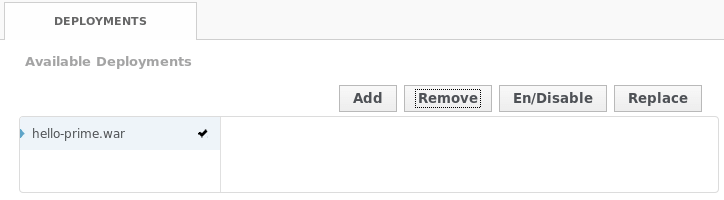
Now test your Primefaces application on the cloud: http://primedemo-wildflyapps.rhcloud.com/hello-prime/

Et voilà! a Primefaces application running on your cloud space! Enjoy it!
Found the article helpful? if so please follow us on Socials


