In this tutorial we will learn how we can configure the Undertow subsystem to reverse proxy request from one application running on one host to another application running on an another host.
At first some some terminology: what is a reverse proxy ? the common usage of the term proxy usually refers to a forward proxy, which is a server that sits between your client and the destination machine. A forward proxy requires a configuration on the client machine in order to relay requests to the destination machine.
A reverse proxy, on the other hand does not require any special configuration on the client side. The client makes ordinary requests for content, the reverse proxy then decides where to send those requests, and returns the content as if it was itself the origin. The client is thus unaware that is request has been proxied.
A typical usage of a reverse proxy is to provide Internet users access to a server that is behind a firewall. Reverse proxies can also be used to balance load among several back-end servers, or to provide caching for a slower back-end server. In addition, reverse proxies can be used simply to bring several servers into the same URL space.
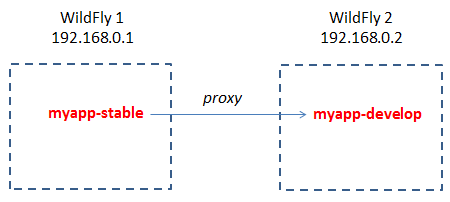
Undertow Web server can provide reverse proxy functionalities with just a few configuration tweaks. Let’s create an example scenario, where we want to proxy requests on host 192.168.0.1 for an application named myapp-stable to another version of the application named myapp-develop running on the host 192.168.0.2.

Creating a Reverse proxy is a two-step procedure: we will show how to do it via XML configuration (should not be your first option, however using the CLI for this purpose is a bit harder to complete because of the many escape sequences required). Open your server configuration on the machine 192.168.0.1 and include in the handlers section of your Undertow subsystem, the following configuration:
<subsystem xmlns="urn:jboss:domain:undertow:1.1">

   <handlers>
   . . . .
   <reverse-proxy name="myproxy">

    <host name="http://192.168.0.2/myapp-develop"/>

   </reverse-proxy>

   </handlers>

</subsystem>
Now all you have to do, is including in your Undertow’s host section, a location element which references your reverse proxy:
<host name="default-host" alias="localhost">
    . . .
   <location name="/myapp-stable" handler="myproxy"/>

 </host>
That’s all! Now your requests from 192.168.0.1/myapp-stable will be transparentely redirected to 192.168.0.2/myapp-develop
Found the article helpful? if so please follow us on Socials