In this tutorial, we’ll explore how to integrate SAML (Security Assertion Markup Language) with Keycloak. SAML 2.0 is a widely-used authentication protocol that exchanges XML documents between authentication servers and applications. In this article we will create a Keycloak SAML Client and then we will provision a WildFly Application Server which will be able to authenticate using SAML Adapter.
What is SAML?
SAML 2.0 is similar to OIDC (OpenID Connect) but is considered more mature. It operates by exchanging XML documents between parties involved in authentication. XML signatures and encryption are utilized for verifying requests and responses.
SAML Use Cases:
- Application Authentication: An application requests the Keycloak server to authenticate a user. Upon successful authentication, the application receives an XML document containing an SAML assertion specifying user attributes.
- Client Accessing Remote Services: Clients can request a SAML assertion from Keycloak to invoke remote services on behalf of the user.
SAML Bindings Supported by Keycloak:
Keycloak supports three binding types for SAML:
- Redirect Binding: This method uses a series of browser redirects with encoded information in the URL. While convenient, it’s less secure because the response is visible in logs.
- POST Binding: This is the recommended approach. It uses POST requests to exchange XML documents between Keycloak and the application, offering better security as the data resides within the request body.
- ECP Binding (Enhanced Client/Proxy): This advanced binding allows SAML attribute exchange outside a web browser, ideal for REST or SOAP-based clients.
Keycloak Server SAML URI Endpoints:
Keycloak has one endpoint for all SAML requests:
http(s)://authserver.host/realms/{realm-name}/protocol/saml
All SAML bindings use this endpoint. To see it in action, we will now bootstrap Keycloak and import a Realm which already contains a SAML Client.
Configuring SAML with Keycloak
Firstly, start Keycloak and bind it to port 8180 to avoid conflict with the Port of the WildFly (8080). For this purpose, you can either download it or boot it from a Docker image.
For example, if you want to start a local Keycloak server, you can start it as follows in Development Mode:
./kc.sh start-dev --http-port=8180
On the other hand, if you want to start it as a Docker image, you can run it as follows:
docker run --name keycloak --rm \
  -e KEYCLOAK_ADMIN=admin \
  -e KEYCLOAK_ADMIN_PASSWORD=admin \
  --network=host \
  quay.io/keycloak/keycloak \
  start-dev \
  --http-port=8180
More info about using Keycloak as Docker Image is available here: How to run Keycloak with Docker
Then, we will import a Realm which contains a SAML Client so that we can check the key settings of it.
Download the following example realm from KeyCloak Quickstart Directory: https://github.com/keycloak/keycloak-quickstarts/tree/main/jakarta/servlet-saml-service-provider/config
Then, log into KeyCloak Admin Console (http://localhost:8080) and choose to Create Realm Button:
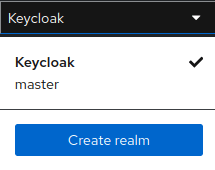
Then, import the quickstart Realm from the realm-import.json.
Configuring the SAML Client
You should find a Keycloak Client whose name is servlet-saml-service-provider. Let’s see how this Client was created:
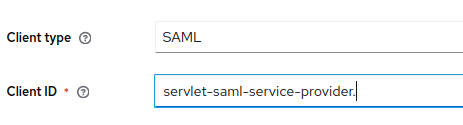
Firstly, you need to create a new Client and choose a name and, as Client type, SAML :
Then, enter in the Home URL and in the Valid redirect URIs the application server path combined with the Web Context of your application. Since our Web context will be “servlet-saml-service-provider”, you will use the following settings:
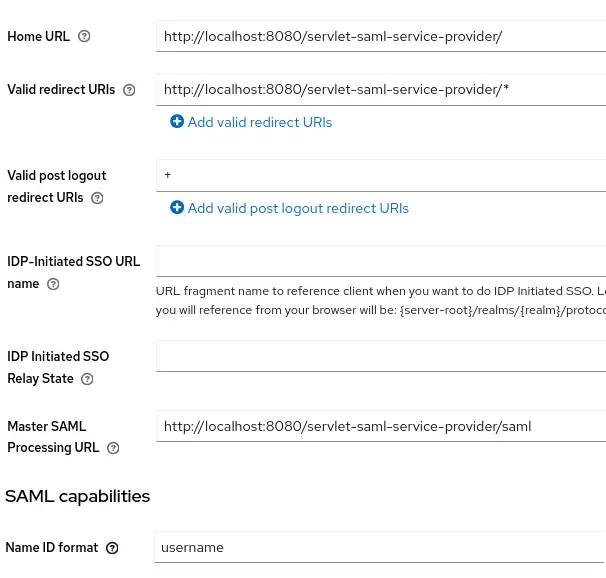
The Master SAML Processing URL will be used for every binding to both the SP’s Assertion Consumer and Single Logout Services.
Finally, the Name ID format should be set to username which will let you use the name ID format for the subject.
Adding Users and Roles
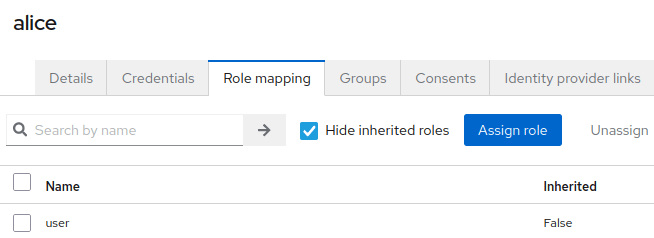
To test SAML Authentication, the quickstart Realm also contains an Username “alice”:
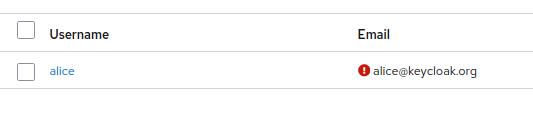
The user “alice” belongs to the “user” Role as you can see from the Role Binding Tab:
Download the Keycloak SAML Adapter XML
The last step will be downloading Keycloak SAML XML Adapter which needs to be installed in our WildFly application. To download it, select again the servlet-saml-service-provider Client. Choose the Keys Tab and then, from the top right corner choose as Action:
- Export. This will download the servlet-saml-service-provider.json containing the Private Key to include in the XML Adapter
- Download the SAML Adapter keycloak XML File:

Before installing the XML Adapter on WildFly, you need to apply a couple of customizations in it:
- Include the
logoutPagewhich will be index.jsp - Include the
PrivateKeyPem. You can obtain the PrivateKeyPem from the servlet-saml-service-provider.json .
Here is how the keycloak-saml.xml file looks like in our example:
<keycloak-saml-adapter>
    <SP entityID="servlet-saml-service-provider"
        sslPolicy="EXTERNAL"
        logoutPage="/index.jsp">
        <Keys>
            <Key signing="true">
                <PrivateKeyPem>
                    MIIEogIBAAKCAQEAyA5Xt9aS81498elxZUHBiA8gRXXmEoXA8n/tdwzBk0qMMnt+3iRM+gq9ngkZkQC6QFuO85wmQXSBpxGCMOCn2k671jNmGLgwnAPPFkQSQu7vPZIP5ugkS4/xkIBFyqWIUuNDmTdXCkWgBn2Qw5l6R/yh05uYHrH8Rw6l9kMS051+kNdHDZLWrD9sqluNyopLPu7U70L5mv4PDy/TsltVs/itiv/wF+ru8VwHfSB/xgQj2efrNHszBHOsHa7gfgKuwsu/YGYs8aS4AS1gSgWGefy8ji3hd/2gh55YCwkuvArcsKevwqkmE76OQsG77cQvLqYcafc+RRd8asA7BUs/PQIDAQABAoIBAELnMQSk+L30zWiCdk6zn+I9lMBF/mxBWNaAW8zNckssyhfz3uixYSDZyLH6PxeUE7WEKRllJhILwXQ60bxA1UGXxQ+MXt9zcaYrS+0ZVLYXq+B+YV0KU2EFwXZev3hWxXFa2Xd631vrDuo8wdX4FMHQRdo7lbLmOQUWbAAgTEKCOIKxHtZYqb+J3BK4g347SzYvKpvqXhavIpVRQm5vLYPrge1gE83jo9ag2uAHCHpeToaH1Bohp7/tu6MWCnKiL9GBY5Me/PLmY5nADLaGspndYVCaxJbRQyfX0KlKqqlj2LBlVZS9ojhnyZLxymrvNmtqrcrMoJPE15jF4v/sc40CgYEA7w567TMXAJDF9QwaHZ4ZJeQL365mtRiiQQpLok2eVIqlr/C4i7SqCs5C8QoA9by9I2Usa5EFEgKsme+W98pkNy1ynkYKDuzo57PMkNzHmsqLaqCsfY/zqdodrSVLoA9+nI82TCR7YKcZDpgpMa35mVdYQzbZIYWxnCpkfRGd6yMCgYEA1jw5XKa7zBtE0QByNpGV1zUVkl2qJZcrp6fA4syp5VxhC0IpYg1Qu6ZL0lSvYLfGGQiURLAXQAv1EtkTRv1ol3l859DxFrI4GWuNhH1zE6kuomT4zwhQTa8dZsCmuP3WdJKsOUaDwFTOf0u2Ik7o/zzmOpjiYsdk5vjeVPVsgh8CgYALdRE1Lx6qG0YxkWvrAXnJFB3xkYVApraYEWtAkyHEgYShYxMlNvpzXCFfNhCHto0GFkJDwYaRr2kgU5hTtfKJpnb42PiAcKBVAowKYVp7s7ts19iMiAqwmFCVzNTMDhIOZNrAWXtETZ3o0igfRmxRChuj1QwhDCxQBMQeLmr4KwKBgE3M4Sf8hQbCgGNGPjQC+t+Er6jPyxKLq5bfHPVAThK1Uai9BjpNi5wZ8D8Z8fa1xoMg0nd/W3Iu5XlKy+1j6a/YtruY7XTIlAbnQCV1SW1Ca2UeNh05b7BGf+7o16Mmy9LZ0SGbsg0Ov08LN8GN1p+ahiGRk+U7dDFM/7Dqz9URAoGAZZTcUxCT5SdkI0alHDBevpOsn7r04sTpH7xhlZACMlUsL3Lo6ZfedSoEJGLqM2ZODFxRHMvaI5fhI7dToLDctkyic1oPi/wM/lVl+XlnrE/PgPCQIuLIN+BfLCVWuqQL9nfbmkerKUK+W0irZTNSg3QYFBMKEA03GXt0gtvGaYE=
                </PrivateKeyPem>
                <CertificatePem>
                    MIICrzCCAZcCBgFbFRHPvjANBgkqhkiG9w0BAQsFADAbMRkwFwYDVQQDDBBhcHAtcHJvZmlsZS1zYW1sMB4XDTE3MDMyODEzMTcyMFoXDTI3MDMyODEzMTkwMFowGzEZMBcGA1UEAwwQYXBwLXByb2ZpbGUtc2FtbDCCASIwDQYJKoZIhvcNAQEBBQADggEPADCCAQoCggEBAMgOV7fWkvNePfHpcWVBwYgPIEV15hKFwPJ/7XcMwZNKjDJ7ft4kTPoKvZ4JGZEAukBbjvOcJkF0gacRgjDgp9pOu9YzZhi4MJwDzxZEEkLu7z2SD+boJEuP8ZCARcqliFLjQ5k3VwpFoAZ9kMOZekf8odObmB6x/EcOpfZDEtOdfpDXRw2S1qw/bKpbjcqKSz7u1O9C+Zr+Dw8v07JbVbP4rYr/8Bfq7vFcB30gf8YEI9nn6zR7MwRzrB2u4H4CrsLLv2BmLPGkuAEtYEoFhnn8vI4t4Xf9oIeeWAsJLrwK3LCnr8KpJhO+jkLBu+3ELy6mHGn3PkUXfGrAOwVLPz0CAwEAATANBgkqhkiG9w0BAQsFAAOCAQEABQMerrVDcvqaN+d2Fps7qTglLv2kJKSE/6qyisNUry2oDxIX8xnFVPZJRd1np6lwwbBSUK7vf9I1OWOxLTuI8Qa2b+0bEBYrqb00O2L9V5UUEE5/M1BbHKt4EL1L/UXYipwFfD6g5t3w3yd5zDVj6Z7OFXeYpNZMmOF0eUWG9GKRg8lcHPHMm98s3hY0DE+YEJ2cg73MZyom7h2PEhUUt1YgIe63avml+1DBXs3TSUJTngGG7rJGdDV3ZEMV6e45S0aBM78G3Ll1GwM2kDp6sWOHon7YYXqjCohWQPIoypikVKavQj6LV8v9EjVJ3hvGfnNiYefxC1fkPfwJjrtzQw==
                </CertificatePem>
            </Key>
        </Keys>
        <IDP entityID="idp"
             signatureAlgorithm="RSA_SHA256"
             signatureCanonicalizationMethod="http://www.w3.org/2001/10/xml-exc-c14n#">
            <SingleSignOnService signRequest="true"
                                 validateResponseSignature="true"
                                 validateAssertionSignature="false"
                                 requestBinding="POST"
                                 bindingUrl="http://localhost:8180/realms/quickstart/protocol/saml"/>
            <SingleLogoutService signRequest="true"
                                 signResponse="true"
                                 validateRequestSignature="true"
                                 validateResponseSignature="true"
                                 requestBinding="POST"
                                 responseBinding="POST"
                                 postBindingUrl="http://localhost:8180/realms/quickstart/protocol/saml"
                                 redirectBindingUrl="http://localhost:8180/realms/quickstart/protocol/saml"/>
        </IDP>
    </SP>
</keycloak-saml-adapter>
Configuring a sample Web application to use SAML
In order to configure a Web application to use SAML you need to provide the following elements:
Firstly include in your WEB-INF folder the keycloak-saml.xml patched with the information from the previous section:
├── src
│   ├── main
│   │   ├── java
│   │   │   └── org
│   │   │       └── keycloak
│   │   │           └── quickstart
│   │   │               └── profilejee
│   │   │                   └── Controller.java
│   │   └── webapp
│   │       ├── index.jsp
│   │       ├── profile.jsp
│   │       └── WEB-INF
│   │           ├── keycloak-saml.xml
│   │           └── web.xml
Then, in your web.xml specify as authentication method KEYCLOAK-SAML and as security-role “user” ( the only role available in our quickstart-saml domain ):
<web-app
        xmlns="https://jakarta.ee/xml/ns/jakartaee"
        xmlns:xsi="http://www.w3.org/2001/XMLSchema-instance"
        xsi:schemaLocation="https://jakarta.ee/xml/ns/jakartaee https://jakarta.ee/xml/ns/jakartaee/web-app_6_0.xsd"
        version="6.0">
    <security-constraint>
        <web-resource-collection>
            <web-resource-name>app</web-resource-name>
            <url-pattern>/profile.jsp</url-pattern>
        </web-resource-collection>
        <auth-constraint>
            <role-name>user</role-name>
        </auth-constraint>
    </security-constraint>

    <login-config>
        <auth-method>KEYCLOAK-SAML</auth-method>
    </login-config>

    <security-role>
        <role-name>user</role-name>
    </security-role>
</web-app>
Configuring WildFly to use Keycloak SAML
To secure applications running on WildFly with Keycloak SAML, you need to provide keycloak-saml-adapter-galleon-pack and keycloak-client-saml layer. This feature pack automatically installs the Keycloak SAML adapter and the keycloak-saml subsystem in WildFly.
There are several steps to do that from WildFly/Keycloak documentation. However, since we can now use the amazing WildFly Glow to provision WildFly from a Web application, let’s try this new approach!
All you have to do is running WildFly Glow against an application which actually uses keycloak-client-saml layer.
For example, build the following Servlet SAML quickstart example: https://github.com/keycloak/keycloak-quickstarts/tree/main/jakarta/servlet-saml-service-provider
mvn install
Then, provision a WildFly distribution from the servlet-saml-service-provider.war:
./wildfly-glow scan ./examples/servlet-saml-service-provider.war --provision=SERVER
The application will include the following layers and feature packs:
Wildfly Glow is scanning...
context: bare-metal
enabled profile: none
galleon discovery
- feature-packs
   org.wildfly:wildfly-galleon-pack:31.0.1.Final
   org.keycloak:keycloak-saml-adapter-galleon-pack:23.0.0
- layers
   ee-core-profile-server
   keycloak-client-saml
Finally, you can start the WildFly distribution, ready to use Keycloak SAML, with:
server-31.0.1.Final/bin/standalone.sh
Then, you can reach the example application from the index page of the Web Context: http://localhost:8080/servlet-saml-service-provider
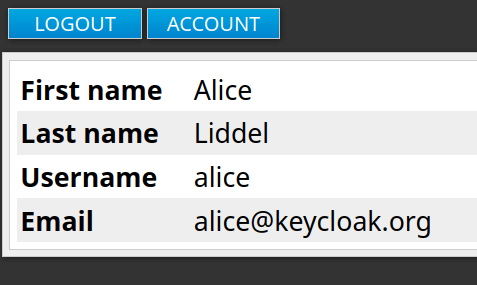
Login using the credentials alice/alice that are available in the Keycloak quickstart Realm:

Finally, you should have access to the profile.jsp page which shows the User details (First Name/Last name/Username/email):
Conclusion
SAML with Keycloak provides a solid SSO solution for integrating existing SAML-based applications or for users specifically requiring this protocol. In this article we have covered the SAML Keycloak Client configuration. Then, we have showed how to provision a WildFly distribution with WildFly Glow which includes the keycloak-saml subsystem.
More info about WildFly Glow are available here: WildFly Glow: Next-Gen Evolution in Provisioning