Many of you have heard about Camel rule based and mediation engine. On this tutorial we will show how to unleash its power to handle the logs from WildFly 9!
First of all, if you need a quickstart tutorial about Camel here is an Hello World Camel quickstart
In order to trigger Came routes, we will configure a Socket Handler on WildFly and then send our logs through TCP. Camel will listen on that Connection and handle your logs using one of its many Components available.
Step # 1: Download the Socket Handler API: a Socket Handler is not native on WildFly configuration, thus we need formerly download the JBoss log Manager extension.
Step # 2: You need to install the Log Manager as a module and assign it to an Handler. In our case, we will assign it to the ROOT handler:
batch

module add --name=org.jboss.logmanager.ext --dependencies=org.jboss.logmanager,javax.json.api,javax.xml.stream.api --resources=jboss-logmanager-ext-1.0.0.Alpha3.jar

/subsystem=logging/custom-handler=socket-handler:add(class=org.jboss.logmanager.ext.handlers.SocketHandler,module=org.jboss.logmanager.ext,named-formatter=PATTERN,properties={hostname=localhost, port=7080})

/subsystem=logging/root-logger=ROOT:add-handler(name=socket-handler)

:reload
run-batch
In the above CLI script, we have defined a new handler named “custom-handler” which is configured to send messages through a TCP connection to localhost and port 7080. Change the above settings to your needs.
Step # 3: Build a simple Camel route which acts as a Server for messages sent by WildFly:
package com.sample;

import org.apache.camel.Exchange;
import org.apache.camel.Processor;
import org.apache.camel.builder.RouteBuilder;
import org.apache.camel.main.Main;

public class TCPExample {

    public static void main(String[] args) throws Exception {
        Main main = new Main();
        main.enableHangupSupport();
        main.addRouteBuilder(new MyRouteTCP());
        main.run(args);
    }
}

class MyRouteTCP extends RouteBuilder {

    @Override
    public void configure() throws Exception {

        from("netty:tcp://localhost:7080?textline=true&sync=false").to("stream:out");

    }
}
The above code will use a Camel netty component to receive text line based TCP messages which will be redirected to a System.out stream. Nothing so fancy, but just enough to stretch our muscles! Remember you need to include the appropriate dependencies in order to run the above class:
<dependency>
	<groupId>org.apache.camel</groupId>
	<artifactId>camel-core</artifactId>
	<version>2.14.1</version>
</dependency>


<dependency>
	<groupId>org.apache.camel</groupId>
	<artifactId>camel-stream</artifactId>
	<version>2.14.1</version>
</dependency>


<dependency>
	<groupId>org.apache.camel</groupId>
	<artifactId>camel-netty</artifactId>
	<version>2.14.1</version>
</dependency>
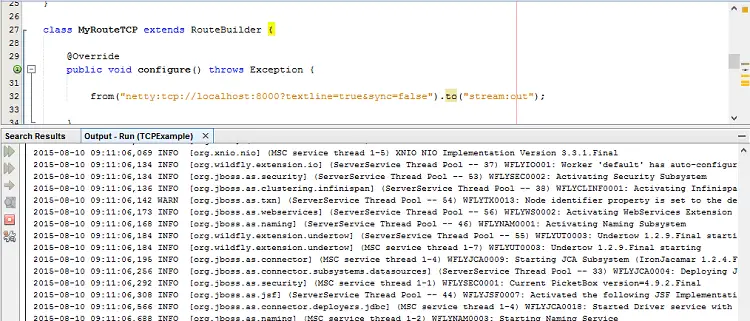
Now start your Camel route and then start also WildFly Application server. You will see then your log messages flowing on Camel’s output console!

From now on it’s up to your imagination what to do with your logs. You can send them by email, to your DropBox account or store them on MongoDB. Here is just as an example, how you could filter for “ERROR” log messages and send them to a JMS Queue:
class MyRouteTCP extends RouteBuilder {

    @Override
    public void configure() throws Exception {

        from("netty:tcp://localhost:7080?textline=true&sync=false").process(new MyProcessor())
                .to("test-jms:queue:logQueue");

    }
}

class MyProcessor implements Processor {

    public void process(Exchange exchange) throws Exception {

        String myString = exchange.getIn().getBody(String.class);
        String[] myArray = myString.split(System.getProperty("line.separator"));
        StringBuffer sb = new StringBuffer();
        for (String s : myArray) {
            if (s.indexOf("ERROR") > -1) {
                sb.append(s);
            }
        }

        exchange.getIn().setBody(sb.toString());
    }

    public MyProcessor() {
    }

}
Here you can get more details about configuring Camel to send messages to a JMS Queue running on JBoss EAP /WildFly.
Have fun with Camel and WildFly!
Found the article helpful? if so please follow us on Socials