In this tutorial we will learn how to deploy a Java EE application on WildFly Container image running on the top of OpenShift Container Platform using OKD.
First of all, you need an OpenShift Container Platform cluster available. We suggest you having a look at the following article to learn how to install the Community version of OpenShift Container Platform:
Getting started with Openshift using OKD
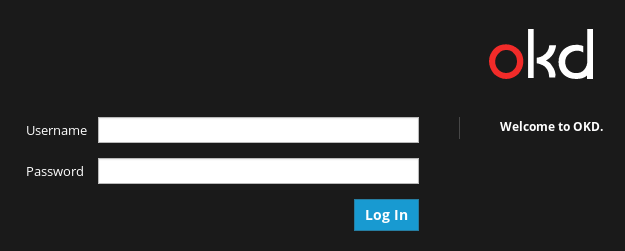
Once that your cluster is up and runing, Log in the OpenShift Container Platform Web console:
You will be redirected in the Browse Catalog screen:
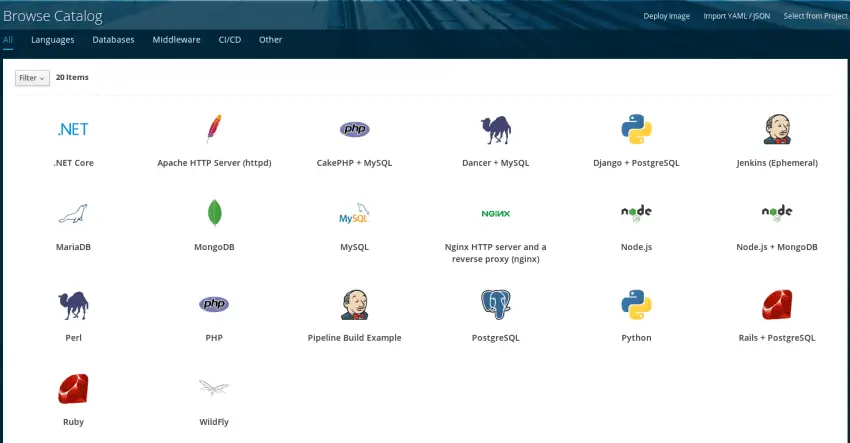
Choose to Create a Project by clicking on the right-screen button and enter a Project Name:

From there, select “WildFly” Container Image. Click “Next” so that you move from the Information screen to the Configuration:

As you can see, in the above screen, we have set the following options:
- Add to Project: The project in which the WildFly SourceToImage Container will be created
- Version: The Version of the application server (Select the latest available version)
- Application Name: This is the name of the OpenShift Container Platform application. There can be only one application with the same name on each Project
- Git Repository: This is the Maven repository that will be used to create the application to be embedded on WildFly. For the purpose of our example we will use this example application: https://github.com/fmarchioni/openshift-jee-sample
Click on Create.
In a few seconds, the build process will start and the application will be deployed on a Pod. A Route will be created as for letting the Service to be accessed from outside:
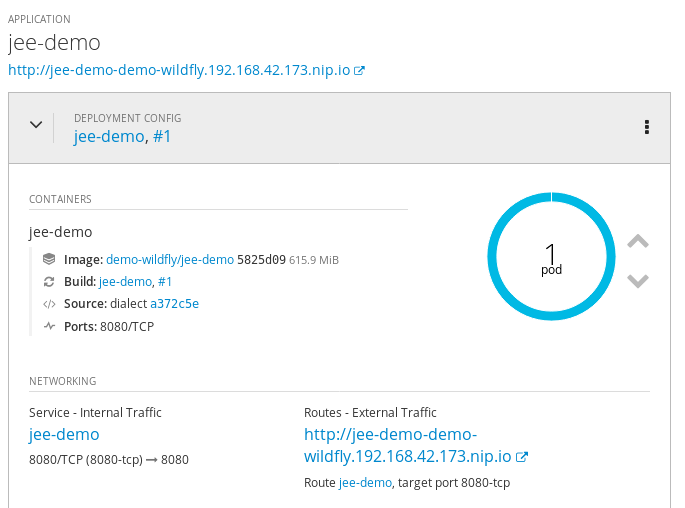
Now, click on the Route Link (in our example http://jee-demo-demo-wildfly.192.168.42.173.nip.io/index.xhtml) to verify that the application is running:

Customizing the database
The example application we have deployed on OpenShift Container Platform uses, by default, the H2 Database that is included in WildFly distribution. We can verify it, by checking into the persistence.xml file (https://github.com/fmarchioni/openshift-jee-sample/blob/master/src/main/resources/META-INF/persistence.xml):
<persistence version="2.0"
   xmlns="http://java.sun.com/xml/ns/persistence" xmlns:xsi="http://www.w3.org/2001/XMLSchema-instance"
   xsi:schemaLocation="
        http://java.sun.com/xml/ns/persistence
        http://java.sun.com/xml/ns/persistence/persistence_2_0.xsd">
   <persistence-unit name="primary">

      <jta-data-source>${env.DATASOURCE:java:jboss/datasources/ExampleDS}</jta-data-source>

      <properties>
         <!-- Properties for Hibernate -->
         <property name="hibernate.hbm2ddl.auto" value="create-drop" />
         <property name="hibernate.show_sql" value="false" />

      </properties>
   </persistence-unit>
</persistence>
The jta-data-source element, contains an environment variable expression that allows a default value (The ExampleDS Datasource), in case the DATASOURCE environment variable is not defined.
For this purpose we will add a PostgreSQL Database and configure the application to use it. The first step will be adding the PostgreSQL Datasource in WildFly. Let’s check for a moment the configuration of our server, by starting a Terminal session on the “jee-demo” Pod.
As an alternative, you can reach the “jee-demo” Pod directly from the shell, using the ‘oc rsh ‘ command, as showed in this transcript:
$ oc project demo-wildfly
Now using project "demo-wildfly" on server "https://192.168.42.173:8443".

$ oc get pods
NAME               READY     STATUS      RESTARTS   AGE
jee-demo-1-build   0/1       Completed   0          15m
jee-demo-2-build   0/1       Completed   0          6m
jee-demo-2-fmj6n   1/1       Running     0          6m

$ oc rsh jee-demo-2-fmj6n

sh-4.2$ vi /wildfly/standalone/configuration/standalone.xml
As you can see, the WildFly template already contains 3 datasource definitions. The ExampleDS is, however, the only one which is enabled:
<datasource jndi-name="java:jboss/datasources/ExampleDS" pool-name="ExampleDS" enabled="true" use-java-context="true">
    <connection-url>jdbc:h2:mem:test;DB_CLOSE_DELAY=-1;DB_CLOSE_ON_EXIT=FALSE</connection-url>
    <driver>h2</driver>
    <security>
        <user-name>sa</user-name>
        <password>sa</password>
    </security>
</datasource>
<datasource jndi-name="java:jboss/datasources/${env.OPENSHIFT_MYSQL_DATASOURCE}" enabled="false" use-java-context="true" pool-name="${env.OPENSHIFT_MYSQL_DATASOURCE}" use-ccm="true">
    <connection-url>jdbc:mysql://${env.OPENSHIFT_MYSQL_DB_HOST}:${env.OPENSHIFT_MYSQL_DB_PORT}/${env.OPENSHIFT_MYSQL_DB_NAME}</connection-url>
    <driver>mysql</driver>
    <security>
      <user-name>${env.OPENSHIFT_MYSQL_DB_USERNAME}</user-name>
      <password>${env.OPENSHIFT_MYSQL_DB_PASSWORD}</password>
    </security>
    <validation>
        <check-valid-connection-sql>SELECT 1</check-valid-connection-sql>
        <background-validation>true</background-validation>
        <background-validation-millis>60000</background-validation-millis>
        <!--<validate-on-match>true</validate-on-match>-->
    </validation>
    <pool>
        <flush-strategy>IdleConnections</flush-strategy>
    </pool>
</datasource>
<datasource jndi-name="java:jboss/datasources/${env.OPENSHIFT_POSTGRESQL_DATASOURCE}" enabled="false" use-java-context="true" pool-name="${env.OPENSHIFT_POSTGRESQL_DATASOURCE}" use-ccm="true">
    <connection-url>jdbc:postgresql://${env.OPENSHIFT_POSTGRESQL_DB_HOST}:${env.OPENSHIFT_POSTGRESQL_DB_PORT}/${env.OPENSHIFT_POSTGRESQL_DB_NAME}</connection-url>
    <driver>postgresql</driver>
    <security>
      <user-name>${env.OPENSHIFT_POSTGRESQL_DB_USERNAME}</user-name>
      <password>${env.OPENSHIFT_POSTGRESQL_DB_PASSWORD}</password>
    </security>
    <validation>
        <check-valid-connection-sql>SELECT 1</check-valid-connection-sql>
        <background-validation>true</background-validation>
        <background-validation-millis>60000</background-validation-millis>
        <!--<validate-on-match>true</validate-on-match>-->
    </validation>
    <pool>
        <flush-strategy>IdleConnections</flush-strategy>
    </pool>
</datasource>
In order to enable one of the available Datasources we need to perform some simple steps:
1) Add to our OpenShift Container Platform Project the Database (PostgreSQL or MySQL)
2) Configure some environment variables so that the WildFly application can use the Database to configure the Datasource
Let’s start by adding PostgreSQL Container image to our Project. Click on “Add to Project” -> “Browse Catalog” and select PostgreSQL:
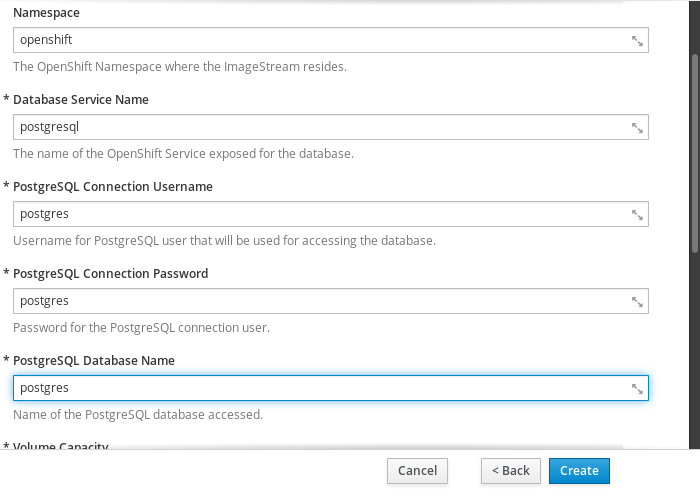
In the PostgreSQL configuration screen, select “postgres” as Username, Password, and Database Name. Click on “Create”.
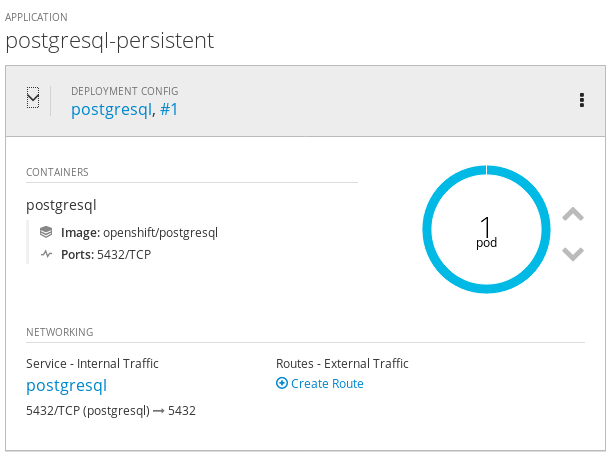
In a few seconds the Pod will be started:
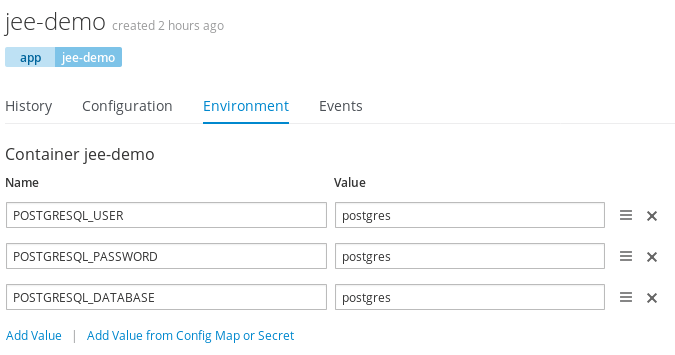
We will now activate PostgreSQL Datasource in WildFly, by setting the following Environment Variable, in the Deployment Descriptor of the “jee-demo” Deployment. Click on “Deployments” > “jee-demo” and select the Environment Tab. Add the following variables:
- name: POSTGRESQL_USER
  value: postgres
- name: POSTGRESQL_PASSWORD
  value: postgres
- name: POSTGRESQL_DATABASE
  value: postgres
Here is your Deployment Config:
Click on “Save”. The Deployment will be re-generated. Now if you log in again into the jee-demo Pod, you will see that the PostgreSQL datasource has been enabled:
<datasource jndi-name="java:jboss/datasources/PostgreSQLDS" enabled="true" use-java-context="true" pool-name="PostgreSQLDS" use-ccm="true">
    <connection-url>jdbc:postgresql://172.30.159.224:5432/sampledb</connection-url>
    <driver>postgresql</driver>
    <security>
      <user-name>postgres</user-name>
      <password>postgres</password>
    </security>
    <validation>
        <check-valid-connection-sql>SELECT 1</check-valid-connection-sql>
        <background-validation>true</background-validation>
        <background-validation-millis>60000</background-validation-millis>
        <!--<validate-on-match>true</validate-on-match>-->
    </validation>
    <pool>
        <flush-strategy>IdleConnections</flush-strategy>
    </pool>
</datasource>
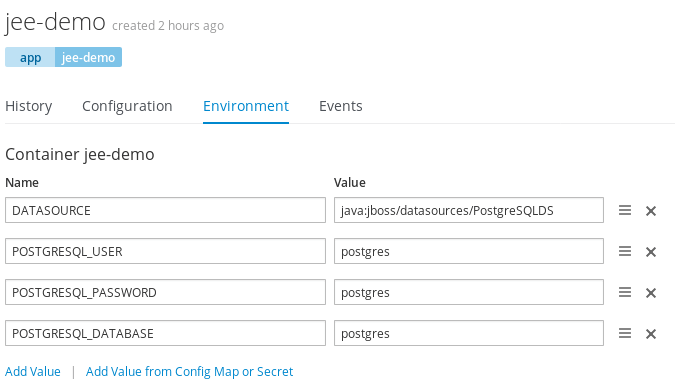
Now, the only thing we have left to do, is telling our application to use “java:jboss/datasources/PostgreSQLDS” datasource in the persistence.xml file. As we have already an available environment variable to customize the Datasource (in persistence.xml), all we have to do is setting the DATASOURCE env variable in the jee-demo Deployment Descriptor to “java:jboss/datasources/PostgreSQLDS“.
Click on Save. The application will be regenerated. Now if you look at the jee-demo Pod logs, you will see that.
15:55:46,779 INFO [org.jboss.as.jpa] (ServerService Thread Pool -- 67) WFLYJPA0010: Starting Persistence Unit (phase 2 of 2) Service 'ROOT.war#primary'
Now reach the application and insert some sample data. You will see, by logging into the postgresql Pod that the data has been stored in the Database:
sh-4.2$ psql
psql (9.6.10)
Type "help" for help.

postgres=# \dt
             List of relations
Schema |      Name      | Type  |  Owner
public | simpleproperty | table | postgres (1 row)

postgres=# select * from simpleproperty; id | value key1 | value1 (1 row)
Conclusion
In this tutorial we have covered a basic JEE application and its installation on WildFly template running on the top of OpenShift Container Platform. We have also learnt how to enable and configure a Datasource to connect to another Service running in your Project
Found the article helpful? if so please follow us on Socials