This tutorial covers how to install WildFly application server on Linux and Windows machines. First off, you need to download a JDK which is supported by WildFly. Then, we will download and unzip the application server.
Installing Java
Firstly, if you are not sure which JDK to download, check this article: Choosing the right JDK for WildFly and JBoss EAP 7 .
Next, Install the Production and Early-Access OpenJDK Builds for your OS from : https://jdk.java.net/
Environment variables settings
Once you have installed Java, set the JAVA_HOME and include in your PATH the bin folder of your Java installation.
Linux users:
Enter in your .profile / .bash_profile script the following (substitute with the actual JDK installation path):
#Set the JAVA_HOME
export JAVA_HOME=~/java/jdk/jdk-17.0.2
#Add the JAVA_HOME to the PATH
export PATH="$JAVA_HOME/bin:$PATH"
Make sure that the above variables come after any existing code that sets PATH.
Windows users:
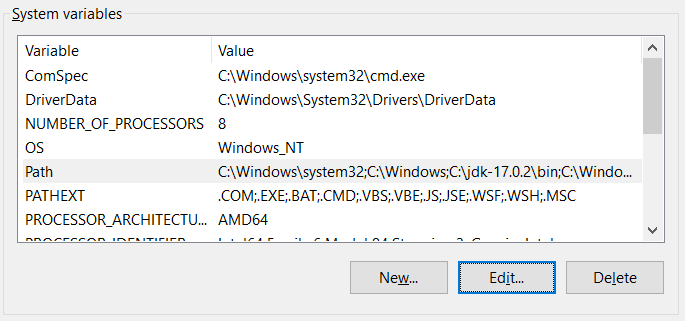
- Open the Start menu and search for environment variables.
- Select the Edit the system environment variables result.
- In the System Properties window, under the Advanced tab, click Environment Variables…
- Select the Path environment variable and Edit to include the bin folder where java/javac is available:
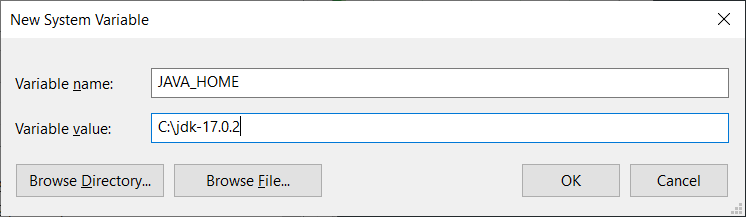
Finally, define a new environment variable JAVA_HOME which points to the root folder where you have installed Java:
Installing WildFly
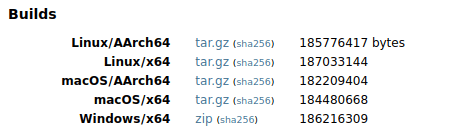
Navigate to https://wildfly.org/downloads/ and download the zip file with the latest stable version of WildFly application server. Unzip the archive and move to the “bin” folder.
Alternatively, you can also download it from the command line with any tool such as curl. For example to download WildFly 27:
curl -L -O https://github.com/wildfly/wildfly/releases/download/27.0.1.Final/wildfly-27.0.1.Final.zip
Move to the folder “bin” which is under WildFly installation and start WildFly with:
$ ./standalone.sh
Windows user will start the application server with:
standalone.bat
The application server will start as you can see from the Console:
15:47:25,343 INFO  [org.wildfly.extension.undertow] (MSC service thread 1-4) WFLYUT0006: Undertow HTTPS listener https listening on 127.0.0.1:8443
15:47:25,432 INFO  [org.jboss.ws.common.management] (MSC service thread 1-3) JBWS022052: Starting JBossWS 5.3.0.Final (Apache CXF 3.3.3)
15:47:25,551 INFO  [org.jboss.as.server] (Controller Boot Thread) WFLYSRV0212: Resuming server
15:47:25,553 INFO  [org.jboss.as] (Controller Boot Thread) WFLYSRV0060: Http management interface listening on http://127.0.0.1:9990/management
15:47:25,553 INFO  [org.jboss.as] (Controller Boot Thread) WFLYSRV0051: Admin console listening on http://127.0.0.1:9990
15:47:25,553 INFO  [org.jboss.as] (Controller Boot Thread) WFLYSRV0025: WildFly Full 18.0.0.Final (WildFly Core 10.0.0.Final) started in 3120ms - Started 315 of 577 services (369 services are lazy, passive or on-demand)
You can check that it’s running, by reaching the home page at localhost:8080

Configuring WildFly as a service on Windows
Installing WildFly as a service for Linux machines is discussed in this tutorial: How to run WildFly as Service
In order to install WildFly as service on Windows, you will need the following steps:
- Firstly, move to the folder “JBOSS_HOME\docs\contrib\scripts\”.
- Next, copy the service directory to JBOSS_HOME\bin
- Then, open an Admin Shell and navigate into the service folder
- Finally, run “service.bat install“

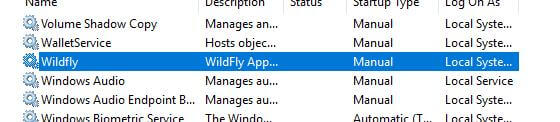
Next open windows Services, you should see Wildfly installed, you can now start it from here and set it to automatic:
Conclusion
By following the above steps, you will be able to successfully install WildFly and begin using it for their Java application needs.
Found the article helpful? if so please follow us on Socials


