How to configure WildFly with YAML files
WildFly 28 includes support for YAML configuration which is offers a more flexible approach in some use cases. In this tutorial we will discuss which are the best scenarios where YAML configuration is a perfect fit and how to configure WildFly to use YAML files
Why YAML Files?
One of the main advantages of YAML files is that they are human-readable and easy to understand. Unlike the CLI, which requires knowledge of specific commands and syntax, YAML files can be easily read and edited by anyone. YAML files also provide a more flexible and modular approach to configuration, allowing you to easily break down complex configurations into smaller, manageable parts.
Using YAML files also allows for version control and tracking changes to the configuration. This is especially useful when multiple people are working on the same server, as it allows for easy collaboration and tracking of changes.
Another advantage of using YAML files is that they enable idempotent configurations. When using the CLI, if you try to execute a script and some resources are already available, the script will fail. On the other hand, when YAML configuration the resources will be simply updated if they already exist.
This makes it easier to spin up WildFly configurations with a set of YAMl files on top of a default server configuration.
WildFly with YAML in practice
Firstly, we will download WildFly 28 (or newer if available) and unzip it in a location of your likes.
Next, let’s create a sample tx.yml file which sets an attribute from the transactions subsystem, the default-timeout:
wildfly-configuration:
  subsystem:
    transactions:
       default-timeout: 400
Save the file. Next, start WildFly passing the -y attribute with the list of YAML configurations that you want to apply to the default installation. In our case, just the tx.yml file:
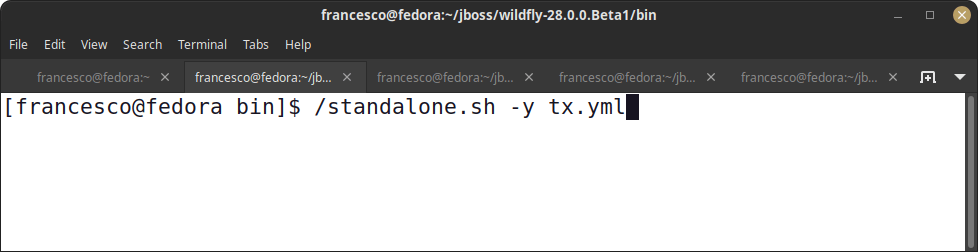
./standalone.sh -y=tx.ymlFinally, verify from the CLI that the configuration attribute is in place:
/subsystem=transactions:read-attribute(name=default-timeout)
{
    "outcome" => "success",
    "result" => 400
}
Applying an advanced YAML configuration
In the next example we will show how to apply a slightly more complex case which involves a Datasource configuration for a PostgreSQL datasource.
YAML Configuration doesn’t provision binaries
You should be aware that the YAMl configuration only applies changes to the WildFly model. Therefore, you should use standard tools (CLI / shell) to add external modules such as Database Drivers. To learn more about adding modules with WildFly Getting started with modules on WildFly
With that in mind, firstly download the PostgreSQL driver locally (for example, from the bin folder of WildFly)
wget https://jdbc.postgresql.org/download/postgresql-42.2.8.jarNext, connect to the CLI and install the PostgreSQL module:
module add --name=org.postgres --resources=postgresql-42.2.8.jar --dependencies=javax.api,javax.transaction.apiThen, make sure PostgreSQL is up and running. For example, you can start it via docker as follows:
docker run --rm --name postgresdb -e POSTGRES_USER=postgres -e POSTGRES_PASSWORD=postgres -e POSTGRES_DB=postgres -d -p 5432:5432 postgres:13Finally, edit the following db.yml file which contains the configuration you need to connect to PostgreSQL with the above credentials and DB settings:
wildfly-configuration:
  subsystem:
    datasources:
      jdbc-driver:
        postgresql:
          driver-name: postgresql
          driver-class-name: org.postgresql.Driver
          driver-module-name: org.postgres
      data-source:
        PostgreSQLDS:
          enabled: true
          exception-sorter-class-name: org.jboss.jca.adapters.jdbc.extensions.postgres.PostgreSQLExceptionSorter
          jndi-name: java:jboss/datasources/PostgreSQLDS
          jta: true
          max-pool-size: 20
          min-pool-size: 0
          connection-url: "jdbc:postgresql://localhost:5432/postgres"
          driver-name: postgresql
          user-name: postgres
          password: ${DB_PW}
          validate-on-match: true
          background-validation: false
          background-validation-millis: 10000
          flush-strategy: FailingConnectionOnly
          statistics-enable: false
          stale-connection-checker-class-name: org.jboss.jca.adapters.jdbc.extensions.novendor.NullStaleConnectionChecker
          valid-connection-checker-class-name: org.jboss.jca.adapters.jdbc.extensions.postgres.PostgreSQLValidConnectionChecker
          transaction-isolation: TRANSACTION_READ_COMMITTED
Please note, in this sample YML file shows how to use an environment variable in the configuration. In our case, the environment variable hides the password field.
We are ready! Before starting WildFly, we will set the DB_PW environment variable to connect to the Database:
export DB_PW=postgresFinally, start WildFly as follows:
./standalone.sh -y tx.yml:db.ymlPlease note that we are using the OS Separator (for Linux “:”) to combine multiple YML configuration files.
You can check that the Datasource configuration is effective with the test-connection-pool command:
/subsystem=datasources/data-source=PostgreSQLDS:test-connection-in-pool
{
    "outcome" => "success",
    "result" => [true]
}
Removing stuff from the configuration
YAML configuration is not just to add resources. You can also use it to remove resources from your configuration or undefine attributes from it.
To remove a resource, include the !remove attribute in a Resource. For example, to remove the H2 Datasource from the configuration you can use:
wildfly-configuration:
  subsystem:
    datasources:
      data-source:
        ExampleDS: !remove
Finally, to undefine an attribute from the configuration you can use the !undefine marker in your configuration as in this example:
wildfly-configuration:
    subsystem:
        logging:
          console-handler:
            CONSOLE:
              level: !undefine
Conclusion
This article showed how to take your WildFly configuration to the next level by using YAML file, which is a built-in feature since version 28 of the application server.
References: https://www.wildfly.org/news/2022/04/26/YAML-configuration-extension/