In this tutorial we will learn what is WildFly and how it can help you to develop Java Enterprise Applications.
An application server exposes business logic to client applications through various protocols, possibly including HTTP. While a Web server mainly deals with sending HTML for display in a Web browser, an application server is not limited to that as it also provides access to business logic for use by client application programs.
- WildFly is a Jakarta EE 10 certified application server. which is compatible with the Core, Web and Full Jakarta EE 10 profiles.
- WildFly is also a compatible implementation of the Microprofile Specification.
The latest version of WildFly is 32.0.0.Beta1. You can download it from here.
What is inside the application server
WildFly simplifies the development of Enterprise applications by providing a list of services out of the box:
- A JDBC Connection pool to manage access to Relational database: You can use the connection pool either directly by injecting a Datasource object in your application or indirectly using for example a JPA application which relies on an available Datasource
- A Messaging broker compatible with the JMS specifications named “Artemis Active MQ“: The embedded messaging broker is available in the “full” and “full-ha” profiles and can be used to produce and consume JMS messages.
- A Resource Adapter compliant architecture so that you can connect to external systems (e.g. Tibco, Weblogic Server, Active MQ, etc). Out of the box, WildFly provides a Resource Adapter for Artemis ActiveMQ which can be used to connect to local or remote Artemis servers.
- An EJB container where you can deploy remote services: EJBs are a server-side software element that summarizes business logic of an application. The EJB container can host a variety of Enterprise Java Beans such as Stateless Beans, Stateful Beans, Message Driven Beans.
- A lightweight and fast Web Server named “Undertow“. This Web server provides support for legacy Web applications (JSP / Servlets) as well for JSF and RESTful interfaces.
- A Batch Job scheduler to execute Tasks and Jobs
- Finally, MicroProfile compatibility with the version 4.1 of MicroProfile Specifications.
The following picture shows the core components of WildFly architecture:
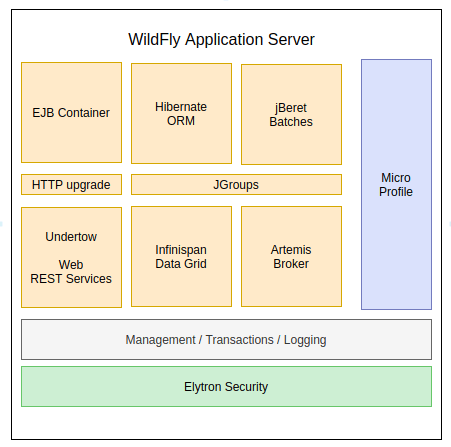
Although the application server is a monolithic piece of software which provides several services, you can easily provision a version of WildFly tailored for your needs. The tool which is used to provision the server layers is called Galleon and you can read an introduction to it here: Provisioning WildFly with Galleon
Server runtime modes
The application server can be booted into two different modes depending on the number of server instances to be managed:
• managed domain – allows to run and manage a multi-server topology. It is suitable when multiple instances of the server needed. In such case it provides a common administration for all instances.
• standalone server – is appropriate when managing only a single server instance.
Here are some common questions if you are pretty new to the topic.
Is WildFly an application server or Web Server?
WildFly is an application server compliant with Jakarta EE 8/9 and Java EE 8 specifications. It does also include a Web server component named Undertow which is available out of the box in all server configurations.
Is WildFly free for commercial usage?
WildFly is free and open-source software, subject to the requirements of the GNU Lesser General Public License (LGPL), version 2.1. Being an opensource project it means you can contribute as well to make it better. You can use the application server both for commercial usage and for non-commercial usage, it’s absolutely free.
Can I use WildFly in production?
As said, the application server is free and open-source so you can use it in production without any fee. The common use cases for WildFly in production are innovative / pilot projects or generally low-risk projects. If your business has critical assets and tight SLAs, then consider using its supported version which is JBoss Enterprise Application Server .
Where can I get support for WildFly?
In terms of support, WildFly is a Community product therefore you rely on its vast Community of users for help. Check the Home page forum to get help on it.
If you want to have commercial support for this product, then you have to use JBoss Enteprise Application Server platform which is a Red Hat Product. Check this out: What is the difference between JBoss EAP, WildFly and JBoss AS ?
Where can I download WildFly?
You can download it from: http://wildfly.org/downloads/
If you are in a hurry, you can just download the latest version with:
wget https://github.com/wildfly/wildfly/releases/download/32.0.0.Beta1/wildfly-32.0.0.Beta1.zip
What is the difference between the preview distribution and the standard distribution?
As you can see from the Download link, there are two main distributions of WildFly:
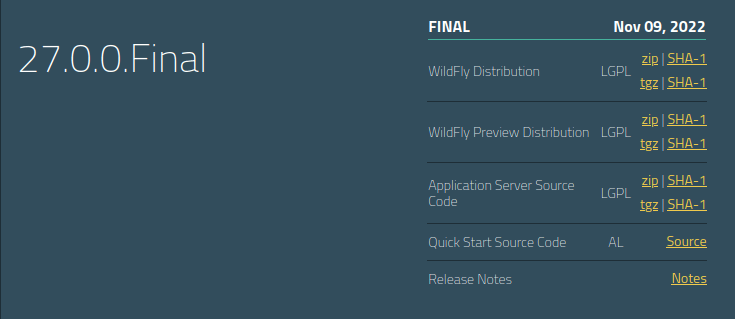
- WildFly Preview Distribution: this is a tech preview distribution of the application server featuring Jakarta EE 10 API. You can use it to test changes that are likely to appear in future releases of the standard WildFly server. For example, you can use it to test the new MicroProfile Micrometer subsystem or RESTEasy Spring support. In terms of configuration, the Preview version does not configure an embedded messaging broker in its
fullprofiles. Therefore, it is meant to be used in combination with a remote ArtemisMQ Server - WildFlyDistribution: this is the stable long term version of WildFly and allows the deployment of Jakarta EE 10 applications. This is the only Jakarta EE 10 and MicroProfile certified version of the application server.


