How to validate Jakarta REST parameters
This article is a walk through the available options to perform validation of REST Endpoint parameters using Jakarta EE. We will show both Bean validation and Entity validation of a REST Service endpoint.
The Jakarta Bean Validation specification allows to define some validation rules, from some built-in on a single field to complex customer rules. You can apply them on a single field or on an entire Class. In this article we will have a look at validating REST Endpoint values.
Validation of Form Data
Firstly, we will begin with a basic example. This Endpoint creates a resource through a POST method which takes as input some Form parameters:
@Path("/person")
public class SimpleRESTService {

	@POST
	@Path("/savePerson")
	@Consumes("application/x-www-form-urlencoded")
	@Produces("application/json")
	public Response savePerson(@NotNull @FormParam("id") String id,
							@Size(min = 3, max = 15) @FormParam("name") String name,
							@Size(min = 3, max = 15) @FormParam("company") String company) {

		Person p = new Person(id, name, company);
		return Response.ok(p).build();
	}


}
In this example, two built-in constraints are applied on the parameters:
- @NotNull which requires the parameter to be not null
- @Size which adds a constraint on the parameter length
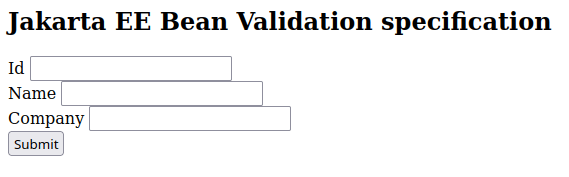
We can use a simple HTML Form to send data that the REST Endpoint will validate:
<h2>Jakarta EE Bean Validation specification</h2>
<form method="POST" action="http://localhost:8080/validation/rest/person/savePerson">
    Id:  <input type="text" name="id"/><br/>
    Name: <input type="text" name="name"/><br/>
    Company: <input type="text" name="company"/><br/>
    <input type="submit" value="Submit"/>
</form>
Deploy the application and request the html page:
If any of the fields are not compliant with the Validation constraints, a response will follow with a violationReport:
<violationReport>
	<parameterViolations>
	<constraintType>PARAMETER</constraintType>
	<path>saveEmp.arg1</path>
	<message>size must be between 3 and 15</message>
	<value>a</value>
	</parameterViolations>
</violationReport>
Using an Exception Mapper to return a custom response
In our earlier example, a violationReport followed up a failed constraint. We can define an ExceptionMapper to map Java exceptions to Response.. More details about exception handling in REST Service are in this article: How to handle Exceptions in JAX-RS applications
Therefore, let’s add an ExceptionMapper class to your project which lists the ConstraintViolations:
@Provider
public class DemoExceptionMapper
        implements ExceptionMapper<ConstraintViolationException> {

    @Override
    public Response toResponse(final ConstraintViolationException exception) {
        return Response.status(Response.Status.BAD_REQUEST)
                .entity(prepareMessage(exception))
                .type("text/plain")
                .build();
    }

    private String prepareMessage(ConstraintViolationException exception) {
        String msg = "ERROR! ";
        for (ConstraintViolation<?> cv : exception.getConstraintViolations()) {
            msg+=cv.getPropertyPath()+" "+cv.getMessage()+"\n";
        }
        return msg;
    }
}
As a result, you should see the following text response if any validation fails:
ERROR! saveEmp.arg1 size must be between 3 and 15Validation using the @Valid annotation
The second approach consists in using the @Valid annotation on the input parameter. In order to use the @Valid annotation you need a JSR-303 provider (such as Hibernate Validator) in on your classpath.
This approach is quite flexible and you can use it both for Jakarta EE applications and for Spring applications as long as you have Hibernate validator available.
Let’s start defining the constraints on the Entity class:
@XmlRootElement
public class Customer {

    // Getter/Setters omitted for brevity

    @NotNull
    String id;
    @Size(min = 3, max = 15)
    String name;
    @Size(min = 3, max = 15)
    String email;
}
Then, you can just apply the @Valid annotation on the incoming parameter:
@POST
@Path("/saveCustomer")
@Consumes("application/json")
@Produces("application/json")
public Response saveCustomer(@Valid Customer customer) {
		return Response.ok(customer).build();
}
To test our endpoint, we can use any tool to post JSON data, such as cURL:
curl -X POST http://localhost:8080/validation/rest/person/saveCustomer -H 'Content-Type: application/json' -d '{"id":"123","name":"myname","email":"a"}'As the email attribute was not compliant, we will see the following response:
saveCustomer.arg0.email size must be between 3 and 15Injecting the Validator in your REST Service
Finally, another option to leverage Hibernate Validator is to inject the jakarta.validation.Validator and manually check the Constraints which are violated. A Validator instance is able to validate instances of beans and their associated objects if any.
Here is an example:
@Path("/example")
public class SimpleRESTService {
    @Inject
    Validator validator;

    @Path("/saveCustomer")
    @POST
    public Response tryMeManualValidation(Customer customer) {
        Set<ConstraintViolation<Customer>> violations = validator.validate(customer);
        if (violations.isEmpty()) {
            return Response.ok(customer).build();
        } else {
            return Response.serverError().entity(violations.toString()).build();
        }
    }
     class Result {

        Result(String message) {
            this.success = true;
            this.message = message;
        }

        Result(Set<? extends ConstraintViolation<?>> violations) {
            this.success = false;
            this.message = violations.stream()
                    .map(cv -> cv.getMessage())
                    .collect(Collectors.joining(", "));
        }

        private String message;
        private boolean success;

        public String getMessage() {
            return message;
        }

        public boolean isSuccess() {
            return success;
        }

    }
}
This example shows how to trigger Hibernate Validator through the validate method. If this set is empty, it means the object is valid. In case of failures, the messages are concatenated and sent back to the browser.
Source code
The Source code for this article is available on Github at: https://github.com/fmarchioni/mastertheboss/tree/master/jax-rs/validation