The latest release of RESTEasy (6.1.0) provides an implementation for Jakarta RESTful Web Services 3.1. which is a core component of Jakarta EE 10. Let’s review through this article which are the core features of Jakarta Rest Services.
What’s new in Jakarta RESTful Web Services 3.1
The Jakarta RESTful Web Services 3.1 specification (part of Jakarta EE 10) includes seceral of small improvements and clarifications as well as new features. Here are the top highlights:
- Java SE Bootstrap API
- Support for Multipart media type
- Deprecation of @Context in preparation for better alignment with CDI
In this article we will cover each of these features with some examples.
Getting Started with the SeBootstrap API
Firstly, the Jakarta Rest 3.1 API provides a standard way of publishing a REST application on Java SE using a bootstrapping code that is completely portable across vendors and products.
In a Java SE environment, it is a common practice to publish an application using an embedded HTTP server. With this new API, an application can invoke the jakarta.ws.rs.SeBootstrap.start(app, config) method with an implementation of Application and a Configuration. For example:
// Bootstrap JAX-RS
SeBootstrap.Configuration requestedConfiguration = SeBootstrap.Configuration.builder().from(config)
	                .build();
The builder is created by SeBootstrap.Configuration.builder() and assembles all information needed to configure the embedded Web server using properties. After that, let’s build a full example application which uses the SeBootstrap API.
Firstly, create a basic Java Web Project.
Next, add a minimal REST Service. For example:
import java.util.Collections;
import java.util.Set;

import jakarta.ws.rs.GET;
import jakarta.ws.rs.Path;
import jakarta.ws.rs.core.Application;
import jakarta.ws.rs.Produces;
import jakarta.ws.rs.PathParam;
import jakarta.ws.rs.core.MediaType;
import jakarta.ws.rs.core.Response;

@Path("/")
public class HelloWorld extends Application {

    @Override
    public Set<Class<?>> getClasses() {
        return Collections.singleton(HelloWorld.class);
    }

    @GET
    @Path("/{name}")
    @Produces(MediaType.TEXT_PLAIN)
    public Response greet(@PathParam("name") final String name) {
        return Response.ok("Hello " +name).build();
    }

}
As you can see, the above HelloWorld class extends the jakarta.ws.rs.core.Application and exposes just a single Resource through a GET method. In addition, let’s add the Bootstrap Class:
import jakarta.ws.rs.SeBootstrap;


public class Main {

    public static void main(final String[] args) throws Exception {
        System.setProperty("java.util.logging.manager", "org.jboss.logmanager.LogManager");
        SeBootstrap.Configuration configuration = SeBootstrap.Configuration.builder()
                .host("localhost")
                .port(8081)
                .protocol("http")
                .build();

        SeBootstrap.start(RestActivator.class,configuration)
                .thenAccept(instance -> {
                    instance.stopOnShutdown(stopResult -> System.out.printf("Stopped container (%s)", stopResult.unwrap(Object.class)));
                    log("REST Server running at %s",
                            instance.configuration().baseUri());
                    log("Example: %s",
                            instance.configuration().baseUriBuilder().path("rest/frank").build());
                    log("Send SIGKILL to shutdown container");
                });
        Thread.currentThread().join();
    }

    private static void log(final String fmt, final Object... args) {

            System.out.printf(fmt, args);
            System.out.println();

    }

}
In short, here is what we are doing here:
Firstly, we are using the SeBootstrap.Configuration Class to provide some custom configuration. In our case, we are building a Configuration which uses port 8081 using the fluent builder API.
Then, we are starting the REST Server with the SeBootstrap.start which receives as input the Application and the Configuration. Likewise, a Shutdown listener will take care to do some clean-up if you send a signal to kill the server.
Finally, we are using the Thread.join() API to put our application in a wait state. Otherwise the server will just shutdown.
To activate the REST Endpoint, you need an Activator Class in your project:
import jakarta.ws.rs.ApplicationPath;
import jakarta.ws.rs.core.Application;

@ApplicationPath("/rest")
public class RestActivator extends Application {
}
Testing the Bootstrap Endpoint
After that, you can optionally add a Test Class, for example with JUnit 5 Test which sends a message to the REST Endpoint:
public class GreeterTestCase {

    private static SeBootstrap.Instance INSTANCE;

    @BeforeAll
    public static void startInstance() throws Exception {
        INSTANCE = SeBootstrap.start(RestActivator.class)
                .toCompletableFuture().get(10, TimeUnit.SECONDS);
        Assertions.assertNotNull(INSTANCE, "Failed to start instance");
    }

    @AfterAll
    public static void stopInstance() throws Exception {
        if (INSTANCE != null) {
            INSTANCE.stop()
                    .toCompletableFuture()
                    .get(10, TimeUnit.SECONDS);
        }
    }

    @Test
    public void greet() {
        try (Client client = ClientBuilder.newClient()) {
            String name="frank";
            final Response response = client.target(INSTANCE.configuration().baseUriBuilder().path("/rest/" + name))
                    .request()
                    .get();
            Assertions.assertEquals(Response.Status.OK, response.getStatusInfo(),
                    () -> String.format("Expected 200 got %d: %s", response.getStatus(), response.readEntity(String.class)));
            Assertions.assertEquals(String.format("Hello %s!", name), response.readEntity(String.class));
        }
    }
}
Building and Running the application
Next, to build our Standalone REST Endpoint, you will need to add the following dependencies:
<dependency>
    <groupId>jakarta.ws.rs</groupId>
    <artifactId>jakarta.ws.rs-api</artifactId>
    <version>${version.jakarta.ws.rs.api}</version>
</dependency>

<dependency>
    <groupId>org.jboss.logmanager</groupId>
    <artifactId>jboss-logmanager</artifactId>
    <version>${version.org.jboss.logmanager}</version>
</dependency>

<dependency>
    <groupId>org.jboss.resteasy</groupId>
    <artifactId>resteasy-undertow-cdi</artifactId>
</dependency>
- The jakarta.ws.rs-api dependency adds the main Jakarta RESTful Web Services dependency.
- The jboss-logmanager dependency provides the JBoss Logging implementation
- The resteasy-undertow-cdi provides RESTEasy Undertow CDI Integration.
Next, run the main class, the Undertow server will start and the Rest Endpoint as well:
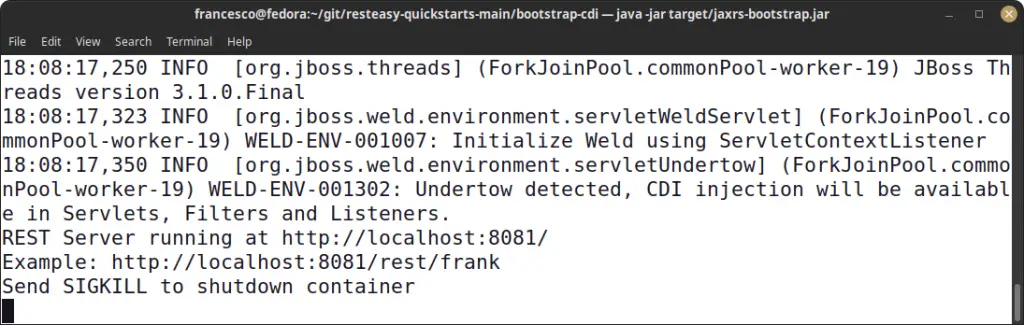
Finally, test the “/greet” Endpoint. For example:
curl http://localhost:8081/frank
Advanced Bootstrap Configuration
Within our example application, we are using a minimal configuration which only sets the HTTP Port. We will show how to use some other configuration options with the fluent API.
Using a different protocol
SeBootstrap.Configuration config = SeBootstrap.Configuration.builder().from(config).protocol("HTTPS")
                .build();
Configuring Client Authentication
SeBootstrap.Configuration.builder().protocol("HTTPS")
                .sslClientAuthentication(SSLClientAuthentication.MANDATORY).build();
Using custom Host, Port and Document Root
SeBootstrap.Configuration config = SeBootstrap.Configuration.builder().protocol("HTTP").host("localhost").rootPath("/").port(8080).build();
Finally, the source code for this article is available here: https://github.com/fmarchioni/mastertheboss/tree/master/jax-rs/jaxrs-bootstrap
Multipart/form-data support
The multipart/form-data media type enables requests to send multiple entities (called Parts) as a single entity. The Jakarta EE 8/9 does not provide a specific support for multpart/form. Therefore, each provider came up with a different option to handle it:
| Library | Jersey | CFX | Resteasy |
|---|---|---|---|
| Multipart param | @FormDataParam | @Multipart | @MultipartForm + @FormData + @PartType |
| Multipart body | MultiPart | MultipartBody | MultipartInput |
| Body Part | Attachment | BodyPart | InputPart |
There are mainly two options to consume multiple parts:
- Declare your resource with a List of EntityPart. This is the only option to access the headers for a particular part. For example:
@POST
@Consumes(MediaType.MULTIPART_FORM_DATA)
public Response postWidget(List<EntityPart> parts) {
  for (EntityPart part : parts) {
    String name = part.getName();
    Optional<String> fileName = part.getFileName();
    InputStream is = part.getContent();
    MultivaluedMap<String, String> partHeaders = part.getHeaders();
    MediaType mediaType = part.getMediaType();
    doSomethingWithPart(name, fileName, is, partHeaders, mediaType);
  }
  return Response.ok().build();
}
Here is another example which produces a List of EntityPart from a List of files:
@GET
@Produces(MediaType.MULTIPART_FORM_DATA)
public List<EntityPart> getAllFiles() throws IOException {
	File dir = new File("/home/jboss/path");
	List<EntityPart> parts = new ArrayList<>();
	for (File f : dir.listFiles()) {
	    parts.add(EntityPart.withFileName(f.getName()).content(new FileInputStream(f))
		                                          .mediaType("application/octet-stream")
		                                          .build());
	}
	return parts;
}
The alternative approach is to use multiple @FormParam parameters. In this case, the value in the annotation corresponds to the name of the part. The parameter type may be a jakarta.ws.rs.core.EntityPart, a java.io.InputStream, or a String. For example:
@POST
@Consumes(MediaType.MULTIPART_FORM_DATA)
public Response postWidget(@FormParam("part1Name") String part1,
                       @FormParam("part2Name") InputStream part2,
                       @FormParam("part3Name") EntityPart part3) {...}
Be aware that String parameter types will load the entire content of the Part into the Java heap. That might be an issue for very large Parts.
Finally, you can also use the EntityPart in the REST Client API to fetch the list of Files and eventually copy them in the local File system:
Client client = ClientBuilder.newClient();
WebTarget target = client.target("http://localhost:8080/multipart");
Response response = target.request(MediaType.MULTIPART_FORM_DATA).get();
List<EntityPart> parts = response.readEntity(new GenericType<List<EntityPart>>() { });
return parts.stream().map(part -> {
    try (InputStream is = part.getContent()) {
        Path file = Files.createFile(Paths.get(part.getFileName().orElse(part.getName() + ".pdf")));
        Files.copy(is, file);
        return file;
    } catch (IOException ioex) {
        LOG.log(Level.WARNING, "Failed to process attachment part {0}", part);
        return null;
    }
}).collect(Collectors.toList());
Deprecation of Context Injection
The JAX-RS API specification provides the @Context annotation to inject a set of object instances related to the context of HTTP requests. Example:
@GET
@Produces(MediaType.APPLICATION_JSON)
public Response getHeaders(final @Context HttpServletRequest request){
    // Code here that uses HttpServletRequest
    }
}
The @Context annotation is deprecated and future versions of Jakarta RESTful services will no longer support it. The same stands for related types such as ContextResolver. As much as possible, all injection tasks will be delegated to Jakarta CDI for a better integration into the Jakarta EE ecosystem.
References:
https://resteasy.dev/2022/04/19/resteasy-releases/
https://jakarta.ee/specifications/restful-ws/3.1/jakarta-restful-ws-spec-3.1.html
Found the article helpful? if so please follow us on Socials


