Web applications were originally based on the request/response pattern: the client sends a request and the server processes data before sending a response; hence, the client is forced to wait for a server response. The main disadvantage of this approach is that a full reload of the web page is required between each request and response; additionally lots of information needed to be sent in the HTTP headers associated with the message. Around 2006, Ajax technology appeared on the scene making Web applications more dynamic yet the HTTP communication was steered by the client, which required user interaction or periodic polling to load new data from the server.
Some other technologies such as “Push” and “Comet” based on long polling connections created the illusion of persistent connections between the client and the server.
Even if all these solutions are still quite popular around the web, none of them actually is able to reduce the overhead of the HTTP protocol, which does not scale on large applications that would need rather a real-time bi-directional communication.
How do WebSockets fit in this picture? let’s see at first the unique features of this technology:
- WebSockets are based on a single TCP connection between two peers. (HTTP on the other hand requires establishing a new TCP connection for each request/response)
- WebSockets are bidirectional: the client can send message to server and vice versa.
- .WebSockets clients can send multiple messages to server (and vice versa) without waiting for the response.
Create the Maven project
We will need a Maven archetype to bootstrap a Web application project. You can use one simple like the following one:
mvn -DarchetypeGroupId=org.codehaus.mojo.archetypes \
-DarchetypeArtifactId=webapp-javaee7 \
-DgroupId=com.itbuzzpress -DartifactId=javaee7-websocket-basic \
-Dversion=1.1 -Dpackage=com.itbuzzpress \
-Darchetype.interactive=false --batch-mode --update-snapshots \
archetype:generate
Now add the following class named HelloWorldEndpoint to your project:
package com.itbuzzpress.chapter9.endpoint;


import javax.websocket.*;
import javax.websocket.server.ServerEndpoint;


@ServerEndpoint(value="/hello")

public class HelloWorldEndpoint {
	@OnMessage
	public String hello(String message) {
		System.out.println("Received : "+ message);
		return "Hello form the Server!";
	}
	@OnOpen
	public void myOnOpen(Session session) {
		System.out.println("WebSocket opened: " + session.getId());
	}
	@OnClose
	public void myOnClose(CloseReason reason) {
		System.out.println("Closing a due to " + reason.getReasonPhrase());
	}
    @OnError
    public void error(Throwable t) {

    }
}
As you can see, turning a POJO into a WebSocket endpoint is trivial. All you have to do is annotating the class with @ServerEndpoint and specifying, via the “value” attribute, the URI path where the endpoint is available.
Next comes the hello() method, which is annotated with @OnMessage. As you probably guessed, this method will be fired each time that a message is received on the endpoint. In this example we are collecting messages as String, however in the next section we will show how to receive different
types of Messages.
Additionally, you can include @OnOpen, @OnClose and @OnError annotations to intercept the opening of a WebSocket session, the closing of it and any error that might arise.
The method annotated with OnOpen receives the WebSocket session as parameter. This can be used for a variety of purposes, such as gathering
information about the running WebSocket session but also to send synchronous/asynchronous messages to the other end of communication.
Coding a Web Socket client:
WebSocket libraries are available in different languages so we have many options for testing our server endpoints. Since we don’t want to download any
extra library we will use the JavaScript WebSocket API that is available on all modern browsers in order to communicate with our endpoints.
You can find an updated list of browsers supporting HTML5 and WebSockets at this address: http://jwebsocket.org/documentation/jwebsocket-supported-browsers
Initiating a WebSocket communication is quite simple as it just requires one parameter, which is the server endpoint URL:
websocket = new WebSocket("ws://localhost:8080/javaee7-websocket-basic/hello");
The protocol used in the WebSocket constructor can be “ws” or “wss”, where the latter indicates a request for a secure connection. In our example, we will initiate a plain text communication to the HelloWorldEndpoint that we have already coded. Here is the full Javascript example:
<html>
    <head>
        <meta http-equiv="content-type" content="text/html; charset=ISO-8859-1">
    </head>
    <body>
        <meta charset="utf-8">
        <title>Your First WebSocket!</title>
        <script language="javascript" type="text/javascript">

            var wsUri = "ws://localhost:8080/javaee7-websocket-basic/hello";

            function init() {
                output = document.getElementById("output");
            }
            function send_message() {
                websocket = new WebSocket(wsUri);
                websocket.onopen = function(evt) {
                    onOpen(evt)
                };
                websocket.onmessage = function(evt) {
                    onMessage(evt)
                };
                websocket.onerror = function(evt) {
                    onError(evt)
                };
            }
            function onOpen(evt) {
                writeToScreen("Connected to Endpoint!");
                doSend(textID.value);
            }
            function onMessage(evt) {
                writeToScreen("Message Received: " + evt.data);
            }
            function onError(evt) {
                writeToScreen('<span style="color: red;">ERROR:</span> ' + evt.data);
            }
            function doSend(message) {
                writeToScreen("Message Sent: " + message);
                websocket.send(message);
                // You can close communication at any time
                //websocket.close();
            }
            function writeToScreen(message) {
                var pre = document.createElement("p");
                pre.style.wordWrap = "break-word";
                pre.innerHTML = message;

                output.appendChild(pre);
            }
            window.addEventListener("load", init, false);
        </script>
        <h1 style="text-align: center;">Hello World WebSocket Client</h2>
        <br>
        <div style="text-align: center;">
            <form action="">
                <input onclick="send_message()" value="Send Message" type="button">
                <input id="textID" name="message" value="Hello WebSocket!" type="text"><br>
            </form>
        </div>
        <div id="output"></div>
</body>
</html>
Once you create a new WebSocket, the communication is virtually identical to the server side that we have already shown: the callback onMessage handler is invoked whenever a message comes from the server, while the function doSend is used to send the message to the remote server, passing the text as an argument. The JavaScript API includes as well notification events when the connection is started (OnOpen event) or when the communication is closed (OnClose) and in case of errors (OnError).
As it is, the application is able to send and receive multiple messages across the endpoints. If you want to close the communication from the client side you can issue the websocket.close()
Compiling the example
In order to compile and test the example, you need to include the WebSocket API dependency in your Maven pom.xml file as follows:
<dependency>
	<groupId>org.jboss.spec.javax.websocket</groupId>
 	<artifactId>jboss-websocket-api_1.0_spec</artifactId>
	<scope>provided</scope>
</dependency>
You can build, package and deploy your application using the usual Maven goals:
$ mvn install wildfly:deploy
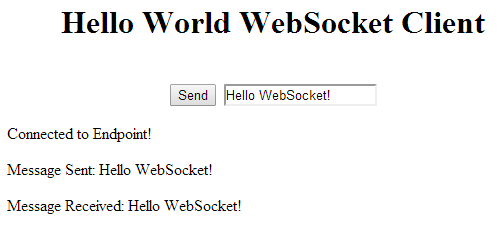
You will now be able to send and receive messages between the endpoints:
Check out the source code for this article: https://github.com/fmarchioni/practical-javaee7-development-wildfly/tree/javaee8/code/chapter9/javaee7-websocket-basic/
Found the article helpful? if so please follow us on Socials


