Jenkins comes with support for some Source Code Management tools like Subversion and CVS out of the box. if you are using Git, however all you need to do is installing the Jenkins Git plugin. The process is pretty simple and this tutorial will give you a demonstration.
Installing Git plugin for Jenkins
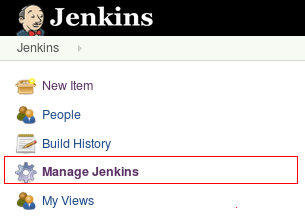
Start Jenkins and click on the Manage Jenkins link to the left of the screen:

Then click on Manage Plugins click:

This will open the plugin configuration window. You should see four available tabs: Updates, Available, Installed, and Advanced. Click on Advanced and type “git” to filter among the long list of plugins. Select the Git plugin:

Choose to install the plugin. Once it is done, you will need to restart Jenkins for the changes to take effect. To do this, click on the “Restart Jenkins when no jobs are running” button displayed on the installation screen, or alternatively shut down and restart Jenkins.
Using the Git plugin in your Projects
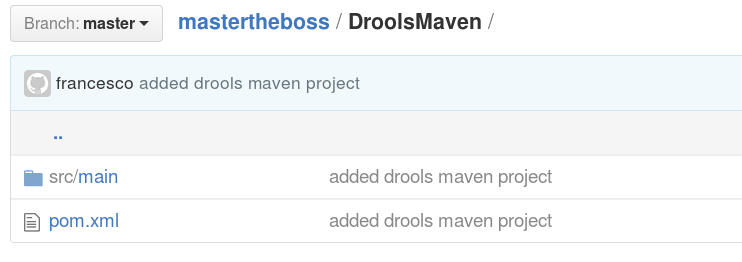
As an example, we will fetch and build a Project which is publicly available at github: https://github.com/fmarchioni/mastertheboss/tree/master/DroolsMaven

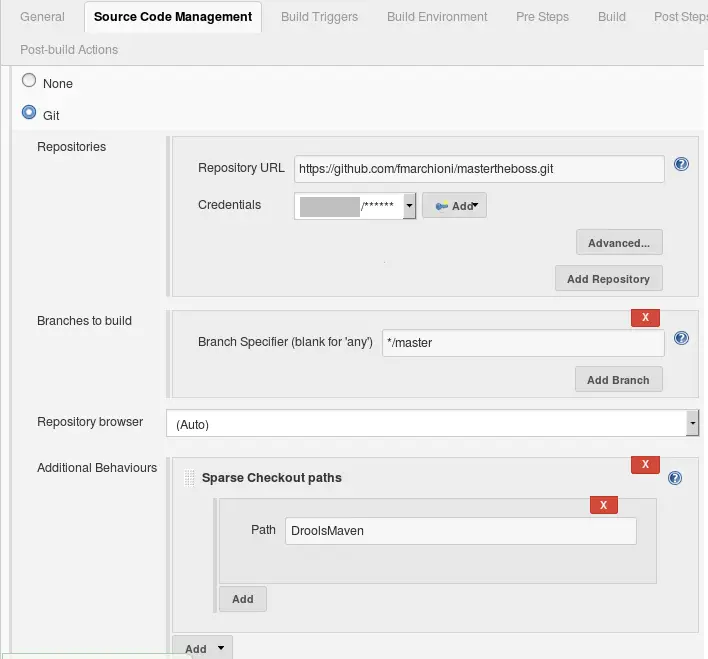
As this is a Maven project, choose to create a new Item | Maven Project from the Jenkins Home page. Here comes the most interesting part: move to the Source Code Management section and select Git as Source Code Management. There you need to set the following elements:
- Enter the Repository URL of the Project
- If you need committing to the repository you will need entering the Credentials by clicking on Add. Otherwise, if you need just a build, leave “None”.
- Specify the branch of the Repository (default “master”)

Git Sparse Checkout
As you can see from the above picture, we had to set the Sparse Checkout paths to the name of the project: “DroolsMaven”. This is needed as the project is not located at the root of the Repository. By using sparse checkout we don’t need to do a git clone of all the Repository.
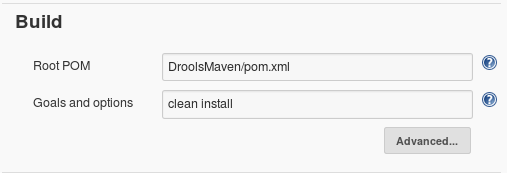
Finally, in the Build section, specify the Root POM of the project. Please note: since we are using a subproject of the Repository, we need to specify the folder name (“DroolsMaven”) in the path:

That’s all! Run the Job and verify that the project has been correctly cloned locally and build:
Started by user Jenkins Admin
Building in workspace /home/francesco/.jenkins/workspace/testgit
 > git rev-parse --is-inside-work-tree # timeout=10
. . . .
[INFO] ------------------------------------------------------------------------
[INFO] BUILD SUCCESS
[INFO] ------------------------------------------------------------------------
[INFO] Total time: 4.747 s
[INFO] Finished at: 2016-08-18T17:58:51+02:00
[INFO] Final Memory: 29M/245M
[INFO] ------------------------------------------------------------------------
Waiting for Jenkins to finish collecting data
[JENKINS] Archiving /home/francesco/.jenkins/workspace/testgit/DroolsMaven/pom.xml to com.sample/DroolsMaven/1.0.0-SNAPSHOT/DroolsMaven-1.0.0-SNAPSHOT.pom
[JENKINS] Archiving /home/francesco/.jenkins/workspace/testgit/DroolsMaven/target/DroolsMaven-1.0.0-SNAPSHOT.jar to com.sample/DroolsMaven/1.0.0-SNAPSHOT/DroolsMaven-1.0.0-SNAPSHOT.jar
channel stopped
Finished: SUCCESS
Found the article helpful? if so please follow us on Socials