Red Hat Code Ready Containers (CRC) provide a minimal, preconfigured OpenShift 4.X single node cluster to your laptop/desktop computer for development and testing purposes. In this tutorial, we will learn how to set up an OpenShift clusters using CRC to emulate the cloud development environment locally and then we will deploy a WildFly application on the top of it.
Installing Red Hat Code Ready Containers
CRC is available on Linux, macOS and Windows operating systems. In this section we will cover the Linux installation. You can refer to the quickstart guide for information about the other OS: https://code-ready.github.io/crc/
On Linux, CodeReady Containers is only supported on Red Hat Enterprise Linux/CentOS 7.5 or newer (including 8.x versions) and on the latest two stable Fedora releases (at the time of writing Fedora 30 and 31).
CodeReady Containers requires the libvirt and NetworkManager packages, which can be installed as follows in Fedora/RHEL distributions:
$ sudo dnf install qemu-kvm libvirt NetworkManager
Next, download the latest release of https://cloud.redhat.com/openshift/install/crc/installer-provisioned for your platform.
TIP: You need register with a Red Hat account to access and download this product.
Once downloaded, create a folder named `.crc` in your home directory:
$ mkdir $HOME/.crc
Then unzip the CRC archive in that location and rename it for your convenience:
$ tar -xf crc-linux-amd64.tar.xz -C $HOME/.crc
$ cd $HOME/.crc
$ mv crc-linux-1.6.0-amd64 crc-1.6.0
Next, add it to your system PATH:
$ export PATH=$HOME/.crc/crc-1.6.0:$HOME/.crc/bin:$PATH
Verify that the crc binary is now available:
$ crc version
crc version
crc version: 1.6.0+8ef676f
OpenShift version: 4.3.0 (embedded in binary)
Great, your environment is ready. It's time to start it!
Starting Openshift cluster
The `crc setup` command performs operations to set up the environment of your host machine for the CodeReady Containers virtual machine.
This procedure will create the ~/.crc directory if it does not already exist.
Set up your host machine for CodeReady Containers:
$ crc setup
INFO Checking if oc binary is cached
INFO Checking if CRC bundle is cached in '$HOME/.crc'
INFO Checking if running as non-root
INFO Checking if Virtualization is enabled
INFO Checking if KVM is enabled
INFO Checking if libvirt is installed
INFO Checking if user is part of libvirt group
INFO Checking if libvirt is enabled
INFO Checking if libvirt daemon is running
INFO Checking if a supported libvirt version is installed
INFO Checking if crc-driver-libvirt is installed
INFO Checking for obsolete crc-driver-libvirt
INFO Checking if libvirt 'crc' network is available
INFO Checking if libvirt 'crc' network is active
INFO Checking if NetworkManager is installed
INFO Checking if NetworkManager service is running
INFO Checking if /etc/NetworkManager/conf.d/crc-nm-dnsmasq.conf exists
INFO Checking if /etc/NetworkManager/dnsmasq.d/crc.conf exists
Setup is complete, you can now run 'crc start' to start the OpenShift cluster
When the set up is complete, start the CodeReady Containers virtual machine:
$ crc start
When prompted, supply your user's **pull secret** which is available at: https://cloud.redhat.com/openshift/install/crc/installer-provisioned
The cluster will start:
INFO Checking if oc binary is cached
INFO Checking if running as non-root
INFO Checking if Virtualization is enabled
INFO Checking if KVM is enabled
INFO Checking if libvirt is installed
INFO Checking if user is part of libvirt group
INFO Checking if libvirt is enabled
INFO Checking if libvirt daemon is running
INFO Checking if a supported libvirt version is installed
INFO Checking if crc-driver-libvirt is installed
INFO Checking if libvirt 'crc' network is available
INFO Checking if libvirt 'crc' network is active
INFO Checking if NetworkManager is installed
INFO Checking if NetworkManager service is running
INFO Checking if /etc/NetworkManager/conf.d/crc-nm-dnsmasq.conf exists
INFO Checking if /etc/NetworkManager/dnsmasq.d/crc.conf exists
INFO Starting CodeReady Containers VM for OpenShift 4.3.0...
INFO Verifying validity of the cluster certificates ...
INFO Check internal and public DNS query ...
INFO Check DNS query from host ...
INFO Starting OpenShift cluster ... [waiting 3m]
INFO
INFO To access the cluster, first set up your environment by following 'crc oc-env' instructions
INFO Then you can access it by running 'oc login -u developer -p developer https://api.crc.testing:6443'
INFO To login as an admin, run 'oc login -u kubeadmin -p 7z6T5-qmTth-oxaoD-p3xQF https://api.crc.testing:6443'
INFO
INFO You can now run 'crc console' and use these credentials to access the OpenShift web console
Started the OpenShift cluster
So, out of the box, two users have been created for you. An admin user (kubeadmin) and a developer user. Their credentials are displayed in the above log.
Now reach the Web console of openshift with:
crc console
You will notice that the connection is insecure as no certificate is associated with that address. Choose to add an Exception in your browser and continue.
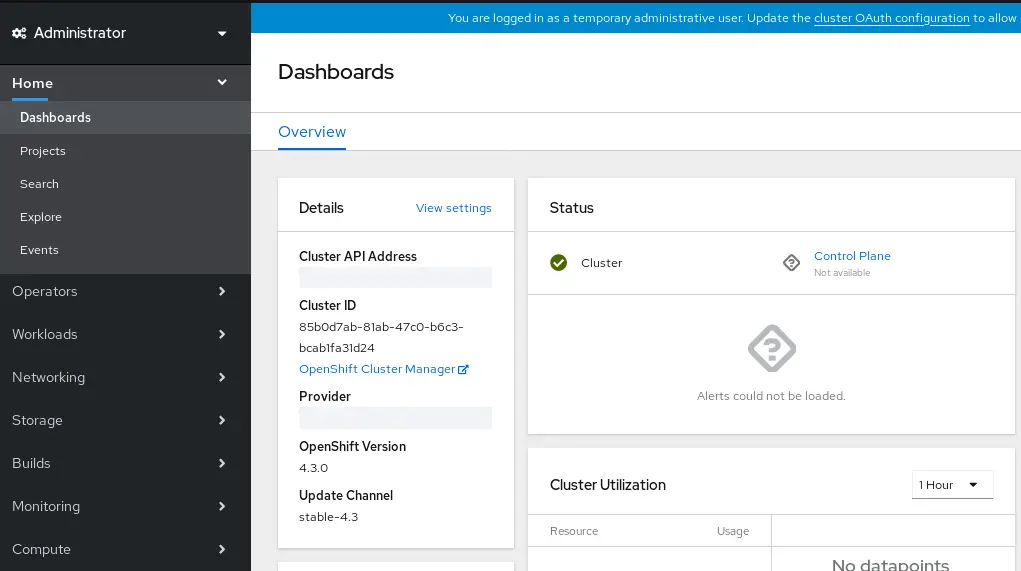
After you have entered the username and password, you will be redirected to the Dashboard of Openshift, which features the default project:
Troubleshooting CRC installation
Depending on your DNS/Network settings, there can be some things that can possibly go wrong.
A common issue which determines the error _"Failed to query DNS from host"_ is normally caused by a misconfiguration of your DNS in the file **/etc/resolv.conf**.
Check that it contains the following entries:
search redhat.com
nameserver 127.0.0.1
This issue is discussed more in detail in the following thread: https://github.com/code-ready/crc/issues/976
Another common issue is signaled by the following error message: _"Failed to connect to the crc VM with SSH"_
This is often cause by a misconfiguration of your virtual network. It is usually fixed by releasing any resources currently in use by it and re-creating through the `crc set up`. Here is the script to perform this tasks:
crc stop
crc delete
sudo virsh undefine crc --remove-all-storage
sudo virsh net-destroy crc
sudo rm -f /etc/NetworkManager/conf.d/crc-nm-dnsmasq.conf /etc/NetworkManager/dnsmasq.d/crc.conf
crc setup
crc start
More details about this are available here: https://github.com/code-ready/crc/issues/711
In general terms, if you find an issue with your CRC cluster, it is recommend to start crc in debug mode to collect logs with:
crc start --log-level debug
Consider reporting the issue on http://gist.github.com/
Deploying WildFly on CRC
As next step, we will deploy a sample Web application which uses an Enterprise stack of components (JSF/JPA) to insert and remove records from a Database. The first step is to create a project for your application using the command `oc new-project`:
$ oc new-project wildfly-demo
The database we will be using in this example is PostgreSQL. A template for this Database is available under the `postgresql` name in the Registry used by CRC. Therefore, you can create a new PostgreSQL application as follows:
$ oc new-app -e POSTGRESQL_USER=wildfly -e POSTGRESQL_PASSWORD=wildfly -e POSTGRESQL_DATABASE=sampledb postgresql
Notice the `-e` parameters, that are used to set the Database attributes using Environment variables.
Now, check that the Pod for postgresql is running:
$ oc get pods
NAME READY STATUS RESTARTS AGE
postgresql-1-2dp7m 1/1 Running 0 38s
postgresql-1-deploy 0/1 Completed 0 47s
Done with PostgreSQL, we will add the WildFly application. We will need, for this purpose, to load the `wildfly-centos7` image stream in our project. That requires admin permission, therefore login as kubeadmin:
$ oc login -u kubeadmin -p 7z6T5-qmTth-oxaoD-p3xQF https://api.crc.testing:6443
Now you can load the `wildfly-centos7` image stream in our project:
$ oc create -f https://raw.githubusercontent.com/wildfly/wildfly-s2i/wf-18.0/imagestreams/wildfly-centos7.json
Done with the image stream, you can return to the developer user:
$ oc login
Authentication required for https://api.crc.testing:6443 (openshift)
Username: developer
Password:
Login successful.
You have one project on this server: "wildfly-demo"
Using project "wildfly-demo".
Now everything is ready to launch our WildFly application. We can use one example available on github at: https://github.com/fmarchioni/openshift-jee-sample . To launch our WildFly application, we will be passing some environment variables, to let WildFly create a PostgreSQL datasource using the correct settings:
$ oc new-app wildfly~https://github.com/fmarchioni/openshift-jee-sample --name=openshift-jee-sample -e DATASOURCE=java:jboss/datasources/PostgreSQLDS -e POSTGRESQL_DATABASE=sampledb -e POSTGRESQL_USER=wildfly -e POSTGRESQL_PASSWORD=wildfly
You might have noticed that we have passed also the environment variable named `DATASOURCE`. This variable is used specifically by our application. If you check the content of the file https://github.com/fmarchioni/openshift-jee-sample/blob/master/src/main/resources/META-INF/persistence.xml, it should be clear how it works:
<persistence version="2.0"
xmlns="http://java.sun.com/xml/ns/persistence" xmlns:xsi="http://www.w3.org/2001/XMLSchema-instance"
xsi:schemaLocation="
http://java.sun.com/xml/ns/persistence
http://java.sun.com/xml/ns/persistence/persistence_2_0.xsd">
<persistence-unit name="primary">
<jta-data-source>${env.DATASOURCE:java:jboss/datasources/ExampleDS}</jta-data-source>
<properties>
<property name="hibernate.hbm2ddl.auto" value="create-drop" />
<property name="hibernate.show_sql" value="false" />
</properties>
</persistence-unit>
</persistence>
So, when passing the environment variable named `DATASOURCE` the application will be bound to that Datasource. Otherwise, the ExampleDS database will be used as fall-back solution.
To get back to our example, the following log will be displayed when you have created the wildfly application:
--> Found image 38b29f9 (4 months old) in image stream "wildfly-demo/wildfly" under tag "latest" for "wildfly"
WildFly 18.0.0.Final
--------------------
Platform for building and running JEE applications on WildFly 18.0.0.Final
Tags: builder, wildfly, wildfly18
* A source build using source code from https://github.com/fmarchioni/openshift-jee-sample will be created
* The resulting image will be pushed to image stream tag "openshift-jee-sample:latest"
* Use 'oc start-build' to trigger a new build
* This image will be deployed in deployment config "openshift-jee-sample"
* Ports 8080/tcp, 8778/tcp will be load balanced by service "openshift-jee-sample"
* Other containers can access this service through the hostname "openshift-jee-sample"
--> Creating resources ...
imagestream.image.openshift.io "openshift-jee-sample" created
buildconfig.build.openshift.io "openshift-jee-sample" created
deploymentconfig.apps.openshift.io "openshift-jee-sample" created
service "openshift-jee-sample" created
--> Success
Build scheduled, use 'oc logs -f bc/openshift-jee-sample' to track its progress.
Application is not exposed. You can expose services to the outside world by executing one or more of the commands below:
'oc expose svc/openshift-jee-sample'
Run 'oc status' to view your app.
We need to expose our application, so that it can be accessed remotely:
oc expose svc/openshift-jee-sample
route.route.openshift.io/openshift-jee-sample exposed
In a few minutes, the application will be running as you can see from the list of Pods:
$ oc get pods
NAME READY STATUS RESTARTS AGE
openshift-jee-sample-1-95q2g 1/1 Running 0 90s
openshift-jee-sample-1-build 0/1 Completed 0 3m17s
openshift-jee-sample-1-deploy 0/1 Completed 0 99s
postgresql-1-2dp7m 1/1 Running 0 3m38s
postgresql-1-deploy 0/1 Completed 0 3m47s
Let's have a look at the logs of the running Pod of openshift-jee-sample:
$ oc logs openshift-jee-sample-1-95q2g
17:44:25,786 INFO [org.jboss.as.server.deployment] (MSC service thread 1-1) WFLYSRV0027: Starting deployment of "ROOT.war" (runtime-name: "ROOT.war")
17:44:25,793 INFO [org.wildfly.extension.undertow] (MSC service thread 1-2) WFLYUT0018: Host default-host starting
17:44:25,858 INFO [org.wildfly.extension.undertow] (MSC service thread 1-1) WFLYUT0006: Undertow HTTP listener default listening on 10.128.0.70:8080
17:44:25,907 INFO [org.jboss.as.ejb3] (MSC service thread 1-2) WFLYEJB0493: EJB subsystem suspension complete
17:44:26,025 INFO [org.jboss.as.connector.subsystems.datasources] (MSC service thread 1-2) WFLYJCA0001: Bound data source [java:jboss/datasources/PostgreSQLDS]
17:44:26,026 INFO [org.jboss.as.connector.subsystems.datasources] (MSC service thread 1-2) WFLYJCA0001: Bound data source [java:jboss/datasources/ExampleDS]
. . . . .
The interesting bit is that the `java:jboss/datasources/PostgreSQLDS` has been successfully bound. Now reach the application which is available at the following route address:
$ oc get routes
NAME HOST/PORT SERVICES PORT
openshift-jee-sample openshift-jee-sample-wildfly-demo.apps-crc.testing openshift-jee-sample 8080-tcp
A simple Web application will display, which lets you add and remove records that are eventually displayed in a JSF table:
You can check that your records have been actually committed to the database by logging into the postgresql Pod:
$ oc rsh postgresql-1-2dp7m
From there, we will use the `psql` command to list the available databases:
sh-4.2$ psql
psql (10.6)
Type "help" for help.
postgres=# \l
List of databases
Name | Owner | Encoding | Collate | Ctype | Access privileges
----------+----------+----------+------------+------------+-----------------------
postgres | postgres | UTF8 | en_US.utf8 | en_US.utf8 |
sampledb | wildfly | UTF8 | en_US.utf8 | en_US.utf8 |
template0 | postgres | UTF8 | en_US.utf8 | en_US.utf8 | =c/postgres +
| | | | | postgres=CTc/postgres
template1 | postgres | UTF8 | en_US.utf8 | en_US.utf8 | =c/postgres +
| | | | | postgres=CTc/postgres
(4 rows)
Next, let's use the `sampledb` database:
postgres=# \c sampledb
You are now connected to database "sampledb" as user "postgres".
Query the list of tables available in this database:
sampledb=# \dt
List of relations
Schema | Name | Type | Owner
-------+----------------+-------+---------
public | simpleproperty | table | wildfly
(1 row)
The `simpleproperty` Table has been automatically created thanks to the hibernate.hbm2ddl.auto setting which has been set to create-drop. Here is the list of records contained:
sampledb=# select * from simpleproperty;
id | value
----+-------
foo | bar
(1 row)
We have just demonstrated how to deploy a non-trivial example of Enterprise application using a Database backend, by leveraging Red Hat Code Ready Containers technology