This article covers how to install Keycloak Client Adapters on WildFly so that you can let Keycloak manage the whole authentication/authorization of your applications running on WildFly.
Please note: If you are running WildFly 25 or above, you can secure your applications with Keycloak using Elytron OpenID Connect which is available out of the box.
Check this article to learn more: Secure WildFly applications with OpenID Connect
There are mainly three options for patching WildFly with Keycloak Client adapters:
1) Download Keycloak Client Adapters and run the install scripts
The most common option is to download Keycloak client adapters and install them on the top of your WildFly distribution.
Follow these steps:
- Download the WildFly distribution and extract it from the compressed file into a directory on your machine.
- Download the WildFly OpenID Connect adapter distribution from https://www.keycloak.org/downloads.html.
- Extract the contents of this file into the root directory of your WildFly distribution.
When done, run the appropriate script for your platform:
WildFly 10
$ cd bin
$ ./jboss-cli.sh --file=adapter-install-offline.cli
Wildfly 11 and newer
$ cd bin
$ ./jboss-cli.sh --file=adapter-elytron-install-offline.cli
Start the application server.
$ cd bin
$ ./standalone.sh
An example application, running on the top of a patched WildFly installation, is shown in this tutorial: Introduction to Keycloak
2) Install Keycloak layer with Galleon
The keycloak-client-oidc Galleon layer brings the OIDC keycloak subsystem (and associated JBoss modules) and configures the server security. To install it, you need to download the Galleon tool from https://github.com/wildfly/galleon/releases
Once downloaded, unzip and move to the ‘bin’ folder. From there, launch the galleon script:
$ ./galleon.sh
At first, provision a basic WildFly distribution. For example a distribution which contains the web-server layer:
install wildfly:current --layers=web-server --dir=wildfly-keycloak
On the top of that, install the keycloak-adapter-galleon-pack:
install org.keycloak:keycloak-adapter-galleon-pack:12.0.2 --layers=keycloak-client-oidc --dir=wildfly-keycloak
Please notice that, unlike the WildFly feature pack, the Keycloak feature pack is not part of a Galleon universe and so a fully qualified group:artifact:version reference to the feature pack is required.
That’s it. You can now start the application server.
$ cd wildfly-keycloak/bin
$ ./standalone.sh
3) Running your application as Bootable JAR with Keycloak layer
This approach also uses Galleon under the hoods. However, we will be able to run our application as Bootable Jar. Just as a recap, to turn your application as Bootable Jar, it is required to include the wildfly-jar-maven-plugin in your pom.xml file. Within its configuration, we will include the keycloak-adapter-galleon-pack:
    <build>
        <finalName>simple-webapp</finalName>
        <plugins>
            <plugin>
                <groupId>org.wildfly.plugins</groupId>
                <artifactId>wildfly-jar-maven-plugin</artifactId>
                <configuration>
                    <feature-packs>
                        <feature-pack>
                            <location>wildfly@maven(org.jboss.universe:community-universe)#${version.wildfly}</location>
                        </feature-pack>
                        <feature-pack>
                            <groupId>org.keycloak</groupId>
                            <artifactId>keycloak-adapter-galleon-pack</artifactId>
                            <version>12.0.2</version>
                        </feature-pack>
                    </feature-packs>
                    <layers>
                        <layer>web-server</layer>
                        <layer>keycloak-client-oidc</layer>
                    </layers>
                    <context-root>false</context-root>
                    <cli-sessions>
                        <cli-session>
                            <script-files>
                                <script>configure-oidc.cli</script>
                            </script-files>
                        </cli-session>
                    </cli-sessions>
                </configuration>
                <executions>
                    <execution>
                        <goals>
                            <goal>package</goal>
                        </goals>
                    </execution>
                </executions>
            </plugin>
        </plugins>
    </build>
Also notice, to enable Keycloak secure deployments, we need to add a reference to the Keycloak Realm to our deployment. This is done by the configure-oidc.cli script that will be launched on our Bootable WildFly server:
/subsystem=keycloak/secure-deployment=simple-webapp.war:add(realm=wildfly-realm, resource=simple-webapp, public-client=true, auth-server-url=http://localhost:8180/auth/, ssl-required=EXTERNAL)
The full example, forked from WildFly Bootable Jar repository, is available here: https://github.com/fmarchioni/mastertheboss/tree/master/bootable-jar/keycloak
In this repository I have added a script for creating a Keycloak Realm so that you can test it against a Docker image of Keycloak. Let’s see how to test it. First start Keycloak Docker image to run on port 8180:
docker run --rm --name keycloak -e KEYCLOAK_USER=admin -e KEYCLOAK_PASSWORD=admin -p 8180:8180 -it quay.io/keycloak/keycloak -b 0.0.0.0 -Djboss.http.port=8180
Now copy the script.sh available in the root folder in the folder /opt/jboss/keycloak/bin of your Keycloak server:
docker cp script.sh keycloak:/opt/jboss/keycloak/bin
Then, set execution permissions and run the script:
docker exec -it keycloak chmod 755 /opt/jboss/keycloak/bin/script.sh
docker exec -it keycloak /opt/jboss/keycloak/bin/script.sh
The script we have just run, creates a Keycloak Realm named “wildfly-realm” with a Role named “Users”, one User (demo/demo) and a Client application to which we will redirect after login:
#!/bin/bash

cd /opt/jboss/keycloak/bin

./kcadm.sh config credentials --server http://localhost:8180/auth --realm master --user admin --password admin
./kcadm.sh create realms -s realm=wildfly-realm -s enabled=true -o
./kcadm.sh create users -r wildfly-realm -s username=demo -s enabled=true
./kcadm.sh set-password -r wildfly-realm --username demo --new-password demo
./kcadm.sh create clients -r wildfly-realm -s clientId=simple-webapp -s publicClient="true"  -s "redirectUris=[\"http://localhost:8080/simple-webapp/*\"]" -s enabled=true
./kcadm.sh create roles -r wildfly-realm -s name=Users
./kcadm.sh add-roles --uusername demo --rolename Users -r wildfly-realm
That’s it. Now start the Bootable jar:
$ mvn install; java -jar target/simple-webapp-bootable.jar
Reach the secured Servlet at http://localhost:8080/simple-webapp/secured
The Keycloak Login for the Realm will prompt:
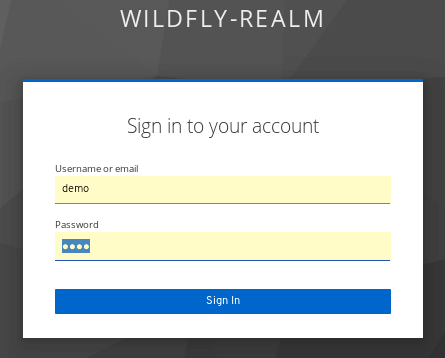
Enter demo/demo. You will be able to access the secured Servlet.
That’s it! Enjoy Keycloak with WildFly.
Found the article helpful? if so please follow us on Socials


