In this tutorial we will move our first steps with Red Hat JBoss Fuse, we will learn what is JBoss Fuse, how to install it and we will run a first demo application on it.
What is Red Hat Fuse ?
In a nutshell Red Hat Fuse is an open source Enterprise Integration Platform and Service Bus. The following picture introduces the core building blocks of JBoss Fuse:

So basically JBoss Fuse is an integration platform which includes some best of breed integration products from Apache such as Apache CXF and Apache Camel, a robust messaging platform, Active MQ , a Transaction Manager (Narayana) and a Web Server to support deployment of WAR artifacts.
You can run Red Hat Fuse using three different Runtimes:
- Karaf: to support OSGi applications
- Spring Boot
- JBoss Enterprise Application Platform
In this article we will learn how to create and deploy a simple Red Hat Fuse project on JBoss EAP. If you want to see an example of a Spring Boot application, then check this article Red Hat Fuse on Spring Boot Tutorial
Installing Fuse
The pre-requisite is that you have an EAP Server which includes Fuse modules in it. If you haven’t done so, check this tutorial to learn how to install Fuse on JBoss EAP.
That being said, you can start Fuse using the standalone.sh /standalone.cmd command from the bin folder of your EAP installation.
Creating your First Project
In order to get started, all you need is a basic Maven project which would be good for a Web application. Here is our project tree:
src
├── main
│   ├── java
│   ├── resources
│   │   └── application.properties
│   └── webapp
│       ├── META-INF
│       │   └── camel-context.xml
│       └── WEB-INF
│           └── web.xml
└── test
    └── java
Next, you need to code your pom.xml. We recommend using a Bill Of Materials for Red Hat Fuse projects to simplify dependencies management:
<dependencyManagement>
  <dependencies>
    <dependency>
      <groupId>org.jboss.redhat-fuse</groupId>
      <artifactId>fuse-eap-bom</artifactId>
      <version>${fuse.version}</version>
      <type>pom</type>
      <scope>import</scope>
    </dependency>
  </dependencies>
</dependencyManagement>
You can find the latest fuse.version on the Maven central repository: https://mvnrepository.com/artifact/org.jboss.redhat-fuse/fuse-eap-bom
Next, include the project dependencies. For example, if you want to use just the core Camel, and support for Camel Spring, the following dependencies will be enough:
<dependencies>
        <dependency>
            <groupId>org.apache.camel</groupId>
            <artifactId>camel-core</artifactId>
            <scope>provided</scope>
        </dependency>

        <dependency>
            <groupId>org.apache.camel</groupId>
            <artifactId>camel-spring</artifactId>
            <scope>provided</scope>
        </dependency>
</dependencies>
If you want to add extra Camel Components to your Route, just add them to the list of dependencies. For example, if you want to add the Kafka Stream Component to your project:
<dependency>
      <groupId>org.apache.camel</groupId>
      <artifactId>camel-stream</artifactId>
      <scope>provided</scope>
</dependency>
Coding the XML Route
In this basic example, we will use an XML file to install a Camel Route. The Route is quite simple: a timer fires every second. The body is printed through the log component.
<?xml version="1.0" encoding="UTF-8"?>
<beans xmlns="http://www.springframework.org/schema/beans"
    xmlns:xsi="http://www.w3.org/2001/XMLSchema-instance" xsi:schemaLocation="http://www.springframework.org/schema/beans              http://www.springframework.org/schema/beans/spring-beans-3.0.xsd                     http://camel.apache.org/schema/spring              http://camel.apache.org/schema/spring/camel-spring.xsd">

 <bean id="properties" class="org.apache.camel.component.properties.PropertiesComponent">
    <property name="location" value="classpath:application.properties"/>
 </bean>

    <camelContext id="demofuse" xmlns="http://camel.apache.org/schema/spring">
        <route id="simpletimer">
              <from uri="timer://simpleTimer?period=1000"/>
                <setBody>
                    <simple>${header.firedTime}</simple>
                </setBody>
              <convertBodyTo type="java.lang.String" />
              <log message="{{message}} - ${body}"/>
        </route>
    </camelContext>

</beans>
This example XMl also shows how to refer to external properties through the PropertiesComponent Spring Bean. The location of the application.properties is the resources folder of your Maven project so that you will find it in the Classpath:
message=Hello
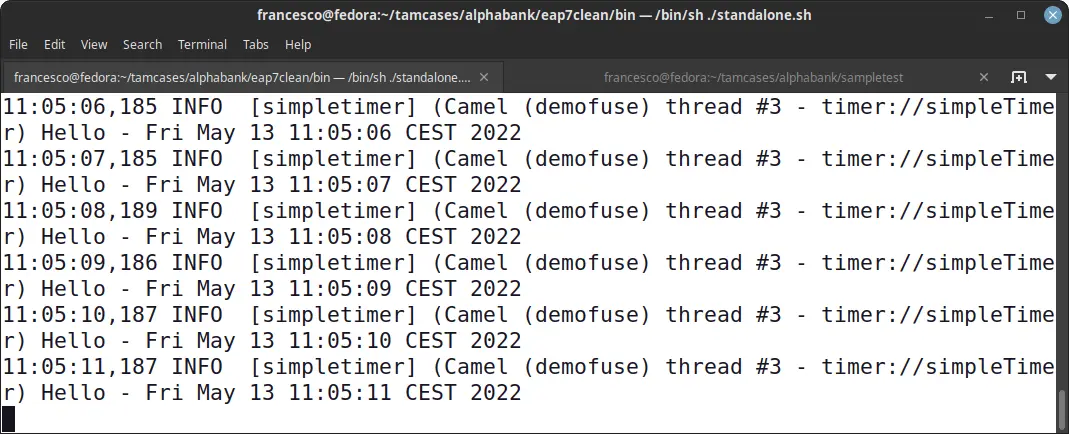
Finish by deploying the application on your EAP/Fuse installation. As a result, you will see Messages printed from your Route on the Console:
Conclusion
In this tutorial we have covered how to create build and deploy a simple JBoss Fuse application using JBoss EAP as Runtime.
You can find the source code for this article: https://github.com/fmarchioni/mastertheboss/tree/master/various/fuse-demo
Found the article helpful? if so please follow us on Socials


