A Jenkins Pipeline is a set of plugins which supports Continous Integration (CI) and delivery. In this tutorial we will learn how to create a simple pipeline to build and test a software release across different stages.
In Jenkins terms, a Pipeline is an automated expression of your process for delivering software from a version control system through to your users and customers. Every change to your software goes through a complex process before being released. This process involves a set of builds through multiple stages of testing and deployment.
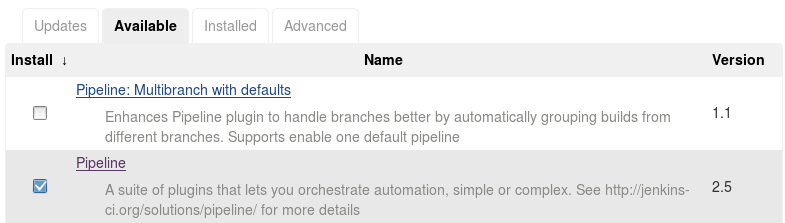
The first thing to get started is to Manage your Jenkins plugins to add the pipeline plugin. Reach the Plugin Manager at http://host:port/pluginManager/
From there install the Pipeline plugin.
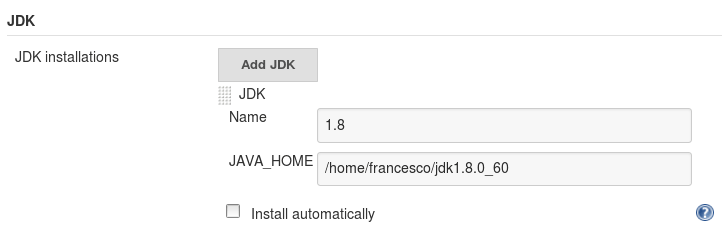
Additionally, as we will need to use Maven and Java in our first Jenkins Pipeline, configure in your Global Tool configuration (http://host:port/configureTools/) the location where Maven and Java are installed. By default, the option “Install Automatically” will install these tools from their default repository.
Uncheck this option if you have installed Java and Maven already on your system:

Creating your first Jenkins Pipeline
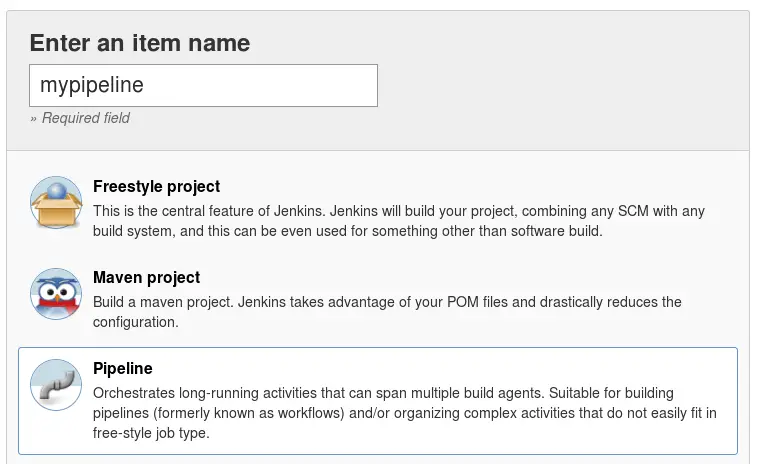
In order to create a new Pipeline, from the Dashboard select “New Item” and choose “Pipeline”:
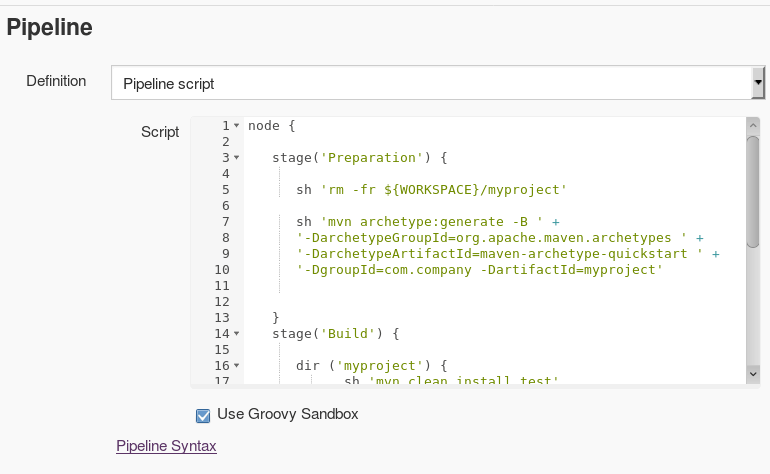
The Jenkins Pipeline code will be added into the section named “Pipeline” of your Item:
What language can be used to code a Pipeline?
A Jenkins Pipeline supports syntaxes: Scripted Pipeline and Declarative Pipeline. Scripted Pipeline is the legacy way to code Pipeline in jenkins and uses Groovy as DSL language.
As it is a fully featured programming environment, Scripted Pipeline offers a lot of flexibility and extensibility to Jenkins users.
The core elements of a scripted Pipeline are:
- A node is a machine which is part of the Jenkins environment and is capable of executing a Pipeline.
- A stage defines a distinct subset of tasks performed through the entire Pipeline (such as “Build”, ” Integration Test” and “Deploy” stages), which are used to visualize or present Jenkins Pipeline status/progress.
Let’s see a basic scripted Pipeline example:
node {

   stage('Preparation') {

      sh 'mvn archetype:generate -B ' +
      '-DarchetypeGroupId=org.apache.maven.archetypes ' +
      '-DarchetypeArtifactId=maven-archetype-quickstart ' +
      '-DgroupId=com.company -DartifactId=myproject'


   }
   stage('Build') {

      dir ('myproject') {
            sh 'mvn clean install test'
      }

   }
   stage('Archive') {
           dir ('myproject/target') {
           archive '*.jar'
      }

   }
}
As you can see, this pipeline is composed of three stages:
- The Preparation stage where a Maven project is created from the maven-archetype-quickstart
- The Build stage where the project is compiled, packaged and tested
- The Archive stage where the output package is archived
If you build the above Jenkins Pipeline the progress will be displayed in the Dashboard page:
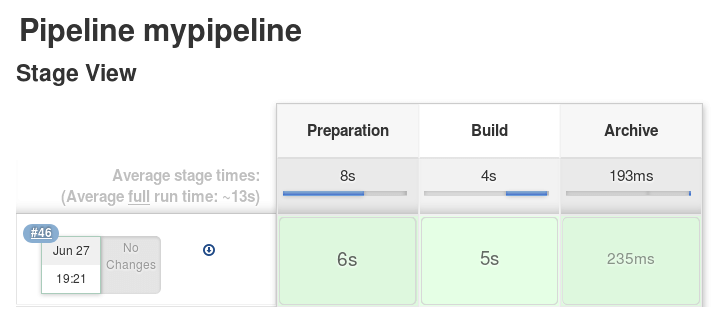
As you can see, all phases have been completed successfully. You can check the Console log to trace all the output produced by your Pipeline and check errors, if any.
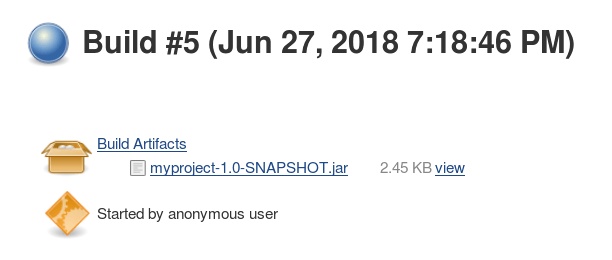
As we have archived the resulting jar file in the Archive stage, this file is available for download in the Build Dashboard as you can see:
Declarative Pipelines
The Groovy learning-curve used in Scripted Pipelines isn’t typically desirable for all members of a team, so a new syntax called Declarative Pipeline was created to offer a simpler and more opinionated syntax for authoring Jenkins Pipeline.
Declarative Pipeline replaces Groovy variable assignments, control structures, loops, and exception handling with a predefined structure and model to allow users of all experience levels to quickly create consistent, concise Pipelines without learning Groovy.
Here is an example of a Jenkins Declarative Pipeline:
pipeline {
    agent any
    stages {
        stage('Preparation') {
            steps {
                      sh 'mvn archetype:generate -B ' +
                    '-DarchetypeGroupId=org.apache.maven.archetypes ' +
                    '-DarchetypeArtifactId=maven-archetype-quickstart ' +
                    '-DgroupId=com.company -DartifactId=myproject'
            }
        }
   	stage('Build') {
           steps {
      		dir ('myproject') {

            	sh 'mvn clean install test'
      		}
      	}

   }
   stage('Archive') {
         steps {
           dir ('myproject/target') {
           archive '*.jar'
         }
      }

   }
    }
    post {
        always {
            echo 'I have finished and deleting workspace'
            deleteDir()
        }
        success {
            echo 'Job succeeeded!'
        }
        unstable {
            echo 'I am unstable :/'
        }
        failure {
            echo 'I failed :('
        }
        changed {
            echo 'Things were different before...'
        }
    }
}
As you can see, a Jenkins Declarative Pipeline contains several new elements:
- The Pipeline block defines your entire build process, which typically includes stages for building an application, testing it and then delivering it.
- The stage block defines a conceptually distinct subset of tasks performed through the entire Pipeline
- A step is a single task which fundamentally tells Jenkins what to do at a particular point in time
We have also included a Post section which comes after the stages and will execute even if the stages failed. In this example I’ve used it to clean up the workspace folder; if you don’t do this Jenkins will fail the next time the pipeline is run. A post is able to capture in a step all the possible outcomes of the Pipeline and handle it before terminating the process.
How to sleep in a Jenkins Pipeline
If you need to introduce a pause within your Pipeline Stages, then you can use the sleep directive specifying the time unit and the amount of time you want to pause:
steps {
  sleep time: 250, unit: 'MILLISECONDS'
}
Have fun with Jenkins Pipelines!
Found the article helpful? if so please follow us on Socials


