GraalVM is an extension of the Java Virtual Machine that is able to support several languages and execution modes. The Graal project includes a new high performance Java compiler, called Graal, which can be used in a just-in-time configuration on the HotSpot VM, or in an ahead-of-time configuration on the SubstrateVM.
The main advantages of GraalVM are as follows:
- No overhead interoperability between different programming languages, which allows you to write polyglot applications
- Improved start-up time thanks to the compilation with GraalVM ahead-of-time and reduced memory footprint of JVM-based applications.
- You can use GraalVM both in standalone environments and managed ones, opening the door to new development models.
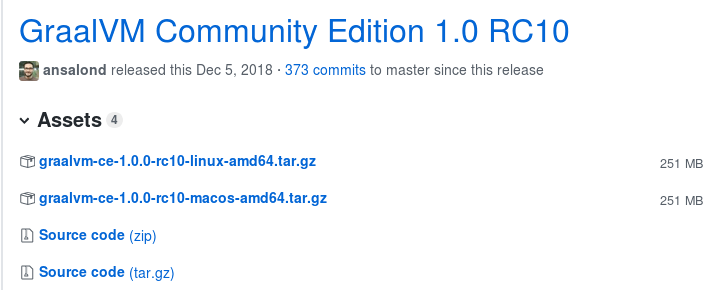
The first step is to download the latest release from GraalVM. You can access the community edition of GraalVM at: https://github.com/oracle/graal/releases

The package includes:
- A JVM to compile and execute Java applications
- An utility for creating native images
- A JavaScript engine & node.js runtime
- A Low Level Virtual Machine (LLVM) engine
You can check that your environment is using GraalVM in the usual way:
$ java -version
openjdk version "1.8.0_192"
OpenJDK Runtime Environment (build 1.8.0_192-20181024121959.buildslave.jdk8u-src-tar--b12)
GraalVM 1.0.0-rc10 (build 25.192-b12-jvmci-0.53, mixed mode)
Building your first native-image
To test GraalVM native compilation, we will use a simple Java class that does some intensive computing due to Random number generation:
import java.util.Random;

public class Main {

    public static void main(String[] args) {
        long timeBefore=System.currentTimeMillis();
        Random rand = new Random();
        for (int i=0;i<100000000;i++) {
            int value = rand.nextInt(1000000);
        }
        long timeAfter=System.currentTimeMillis();
        System.out.println("Completed in "+(timeAfter-timeBefore)+" ms.");
    }
}
Let’s compile it and execute it:
$ javac Main.java
$ java Main
Completed in 2183 ms.
Now let’s unleash the power of Graal, by creating a native-image of the application. We will use for this purpose the command native-image. This command takes as input your Java class(es) and turns them into a standalone binary executable. The syntax you pass to native-image command is pretty much the same of that used for the java command. In this case we have the classpath and the Main class:
$ native-image -cp . Main
Build on Server(pid: 25336, port: 39503)*
[main:25336]    classlist:   2,170.57 ms
[main:25336]        (cap):   1,434.05 ms
[main:25336]        setup:   3,478.88 ms
[main:25336]   (typeflow):   4,699.33 ms
[main:25336]    (objects):     866.02 ms
[main:25336]   (features):     146.47 ms
[main:25336]     analysis:   5,838.53 ms
[main:25336]     universe:     304.88 ms
[main:25336]      (parse):   1,134.40 ms
[main:25336]     (inline):   1,525.76 ms
[main:25336]    (compile):   7,813.08 ms
[main:25336]      compile:  10,809.28 ms
[main:25336]        image:     451.38 ms
[main:25336]        write:     192.52 ms
[main:25336]      [total]:  23,345.24 ms
Now we have an executable file named “main”.
-rwxrwxr-x. 1 francesco francesco 2240200 Dec 20 15:19 main
Let’s run it!
$ ./main

Completed in 1389 ms.
Voilà! we almost reduced by half the time to run the application and what is really awesome is that our application is only 2MB in size, without the need to install hundreds of megabytes of JVM! In the next tutorial we will see how to package native images into a Container image to be executed by Docker. Stay tuned!
Found the article helpful? if so please follow us on Socials